
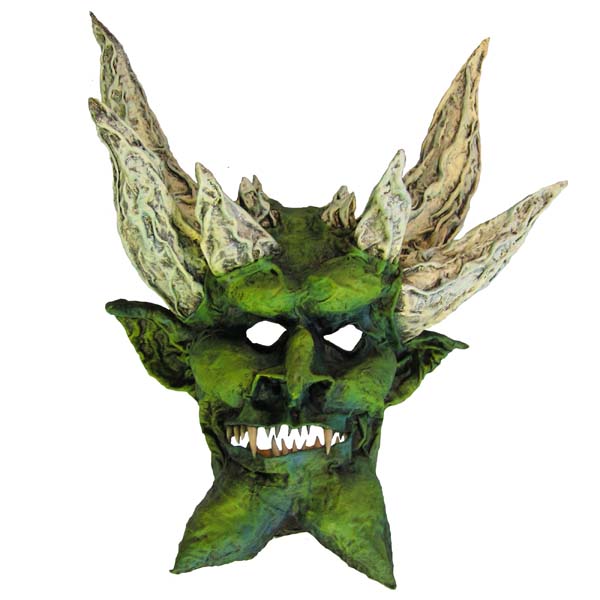
I made a couple of masks for Halloween this year. Since I’ve been asked about masks a lot, I decided to make a couple tutorials about them. I’m putting one on YouTube. And I’ll have one here. You can find the first of the tutorials here. Below is the mask I’ll be making.
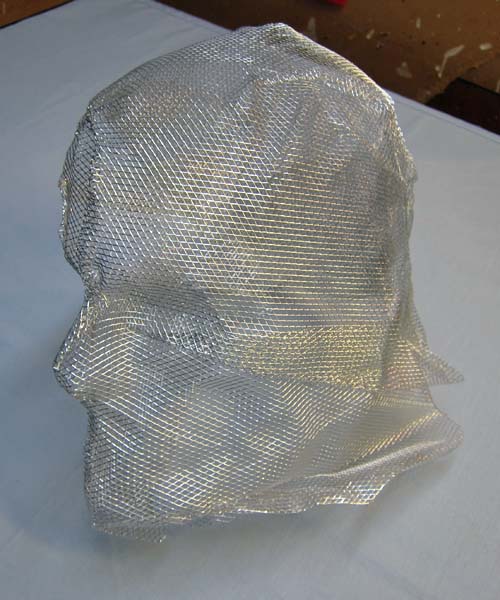
My intention here is to add some commentary and offer a few tips to go along with the mask-making videos on Youtube. If I put everything I wanted to say in the videos they would be way too long. Go beyond five minutes with a video tutorial and it begins to feel like you’re watching paint dry. So I’ll say some things here that I didn’t have time for in the videos. You can read them at your own pace. Or read them really fast (if you took Evelyn Woods’ “Speed Reading” years ago, you can zip through this in 20 seconds, and enjoy none of it.) (You could even read it backwards….like dyslexic people. They actually teach that in that course. )(I have some dyslexia so I can make that joke.)(And I took the Evelyn Woods course when I was in college.)(Couldn’t read any faster when I was done.)(Of course I didn’t do any of the homework.)(See…this is what I call “commentary.”)I want to talk more about the armature of the mask. There are many ways to make an impression. You could run down the street naked. NO…I mean the impression of your head! Some people actually have a friend paper mache on their face. I’ve never done that, but it seems problematic. Too much preparation. And you have to sit with the stuff on your face until it’s sort of dry. I really like this wire. I got this brand at Home Depot. It’s called “Wire Form”. It’s made for this kind of thing. I made four face impressions (and they extended all the way down the back of my head) with the 10 ft by 20 ft piece of wire in the package. Now I must warn you, the edges will poke you and scratch you. The directions say to wear gloves. Yeh….sure….I’ll get out my big work gloves. No…just be careful of the edges.

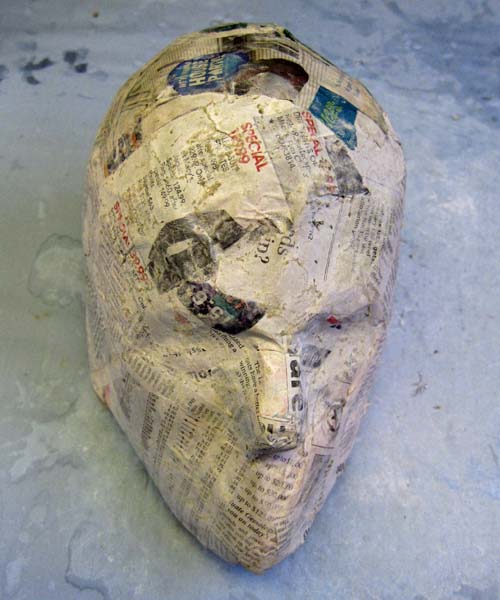
In the video I used my usual “cloth mache” to cover the wire impression. It’s too flimsy to add horns and other details without adding something. You can also use regular paper mache over this wire armature. Just use smaller newspaper strips than usual. I found that it works well to put the wire form over the flour bag. It supports the wire impression perfectly while you work.


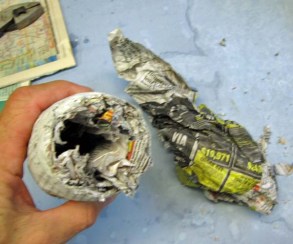
On the left is the dried paper mache version. On the right is the cloth mached version. I still like the cloth mache. It’s very strong and light, perfect for this purpose.

Speaking of cloth….I’ve noticed more people using plaster cloth, the stuff they use for casts when you break your arm. You just dip strips of it in water and apply. I suppose you could have a friend put that on your face too, to make the armature….and then sign it (ha ha). I just think that would be way too heavy. Some paper mache artists are now adding a “skin” of plaster cloth to their projects. I’ve used it. Don’t like it. Too unwieldy. Way too heavy for a mask you might want to wear. And isn’t nearly as effective as the “cloth mache” when it comes to adding details. But don’t take my word for it. Give it a try and let me know what you think.
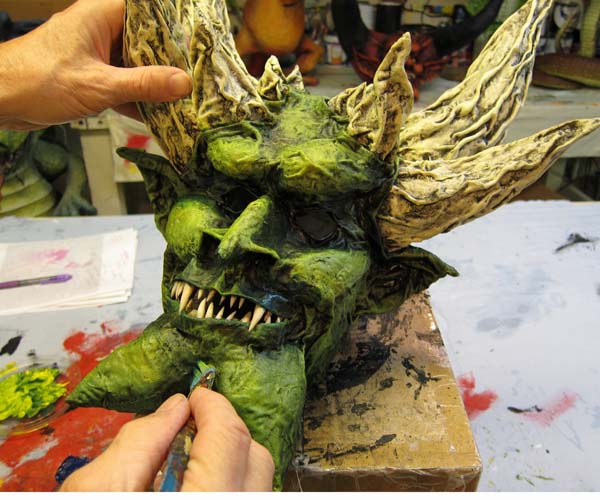
Back to paper mache. For the green-man mask (that I’ll profile on this blog) I made some smaller horns. Once again I just crumpled paper and wrapped with masking tape. I didn’t use clothes hangers with these because they are so small. I will paper mache these horns. Later, when they are dry, I’ll pull the paper out from the inside. As I mentioned, weight is an important consideration when making these masks.

To mache these horns I start at the top and work my way down adding the paper strips as I go. Here’s something I didn’t mention in the videos. Keeping your hands really wet with paste, turn the horn as you add the strips rather than wrapping the paper strips around the horn. I know, this is confusing. I think it will make more sense once you’ve done a bit of paper mache.
Paper Mache “Green Man” Mask: Part 2
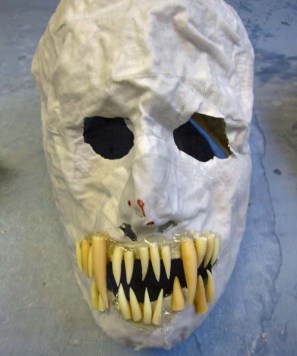
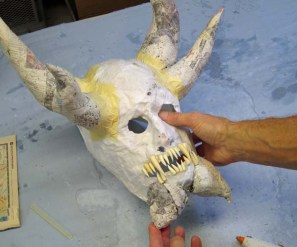
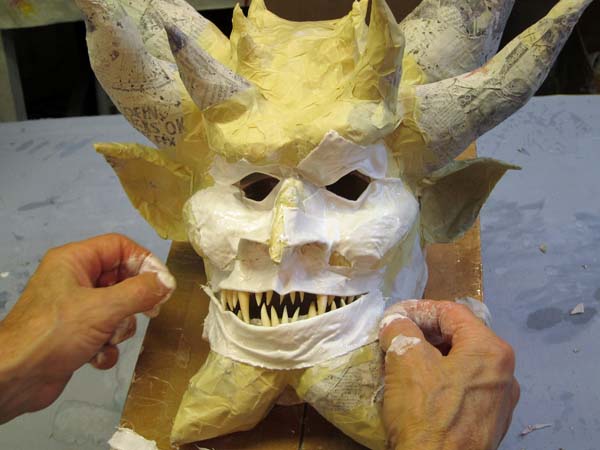
I left off with this cloth mache armature. First, I cut the holes with my knife and scissors. Again, those little wires will prick you if you aren’t careful. I’m not. I have lots of scratches and little puncture wounds. In fact, I have them in places that didn’t get close to the mask. Go figure. Anyway, I made holes for my eyes, my nose, and my mouth. Then I got out my trusty glue gun and added some teeth. Lots. Long pointy ones this time.

As I mentioned in the video, for a mask, weight is really important. So even with these smaller paper mache horns I cut off the ends and pulled out as much paper as I could. You can’t really get a shell that’s too thin. Remember, this gets a skin of cloth mache. That will make them very strong again no matter how thin the walls of the horns get. So have at it.

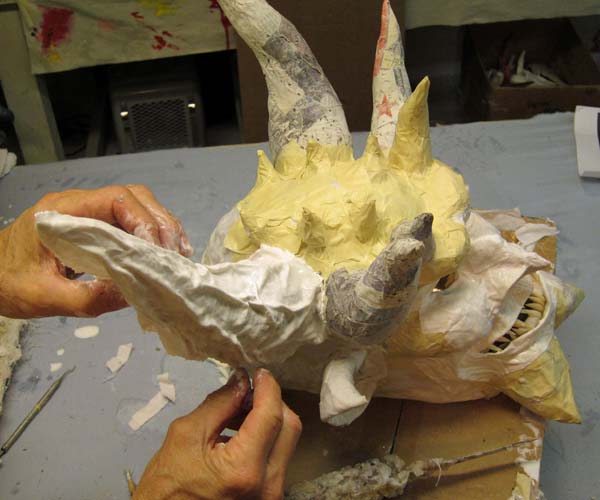
When I was done I attached the bigger horns with hot glue. Speaking of redundant…I always follow hot glue with masking tape. I think I use more masking tape than I need. I’ve been told that a number of times. But this is America. We are trained to use too much of everything, right? In fact, if you want to know a secret, if the masking tape doesn’t hold well, I put hot glue under it. How’s that for neurotic?

I decided I wanted a double chin on this guy. I really mean, two chins. So I cut open one of the extra little paper mache balls I had and used the shell, half on each side of the chin. I like the effect. From this point forward I sculpt primarily by crumpling pieces of newspaper and adding masking tape. These features are too small for more paper mache, although I have left over pieces of shell I will use if they are handy. I made some thick brows above the eyes by crumpling paper. After that I decided to add some more smaller horns, a couple of rows over the top of the head. I used aluminum foil for these. Every so often I like working with aluminum. It works really well for some details like small horns. In fact, you can use sheets of aluminum for the initial armature. You can press it over your face just like I did with the wire mess. You can get a nice impression that way. I know that some of you out there do that.

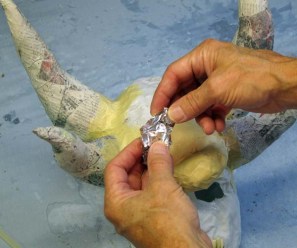
So I fashioned little horns out of aluminum and hot glued them onto the top of the head. Of course I covered them with masking tape. More is better. Right?

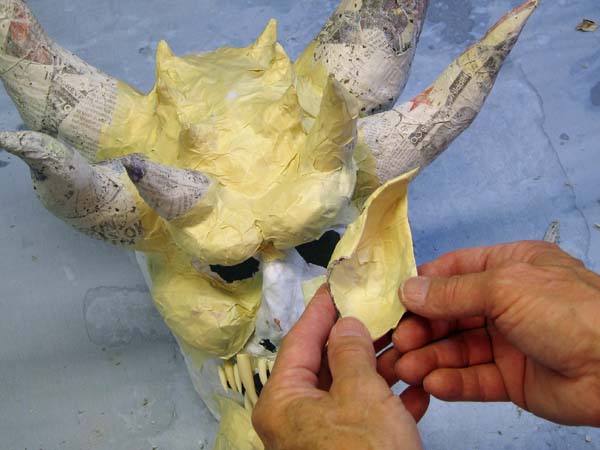

 And in case I haven’t said it enough…I tear the sheet into various sized strips. Tearing gives you two sides that will lay flat. I fold the strips and pull off the strings. Then I cut them at the folds with scissors. I showed this in Part 1 of the mask tutorial. I like to start with the eyes when I cloth mache. I just dip strips of cloth in the glue, fold them and then put them on like you see in the photo. I always play with the lids for quite a while trying to get the attitude I want.
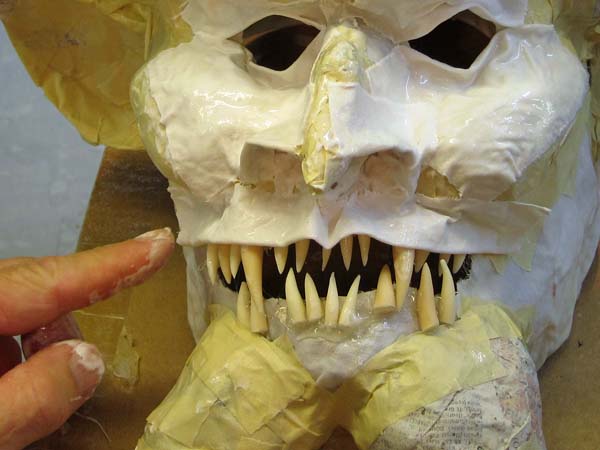
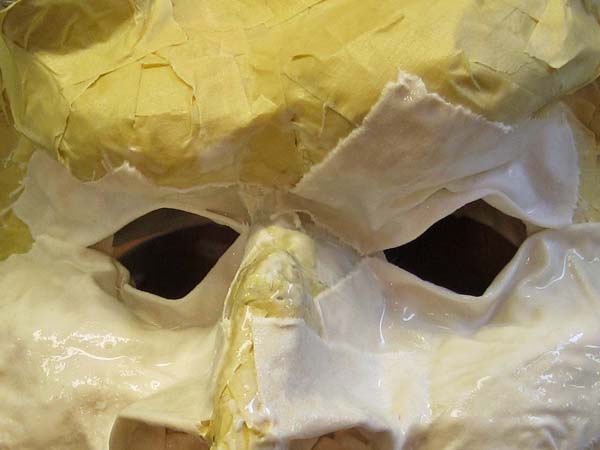 Next, the nose. I stuff a piece of square cloth into the nose and then add pieces on top. Sometimes I do the ears next, but this time I wanted to do the mouth. This is just a bigger version of the eyelids. I take a strip of cloth and fold it. Sometimes I fold it a second time if I want thicker lips. Three times if I’m making an Angelina Jolie mask. I know, I’ve used that joke a dillion times. But someday she is going to see it on her Google Alerts and write to me.

I like to put that little wrinkle under the nose. It’s called something (I know the slang, but there is a real name too). The mask looks nice with it. I generally add one more fold to the bottom lip than I do to the top. It probably doesn’t make any difference, but it feels like I’m making a more natural mouth that way. Of course there is nothing natural about this mouth.
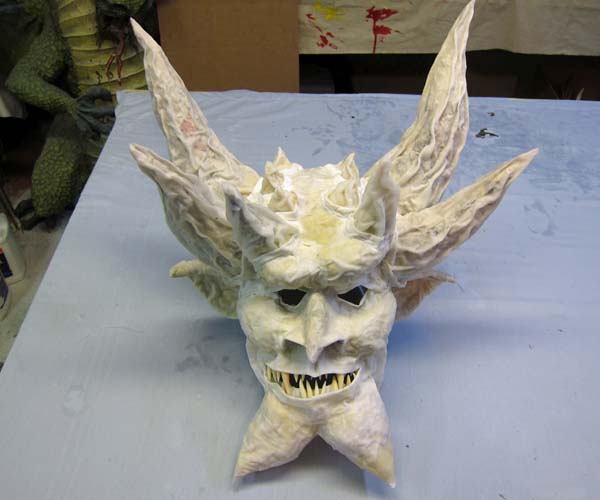
Paper Mache “Green Mask”: Final


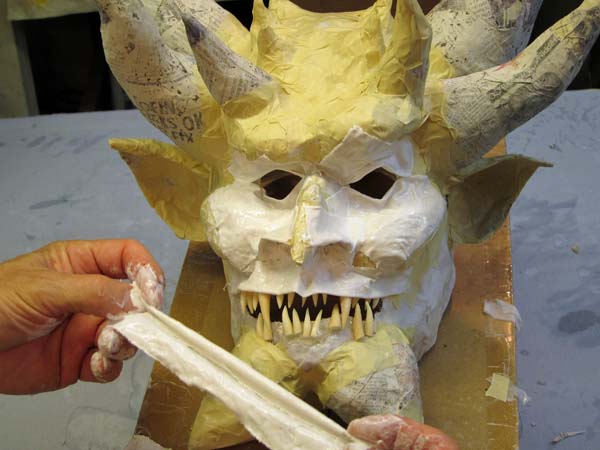
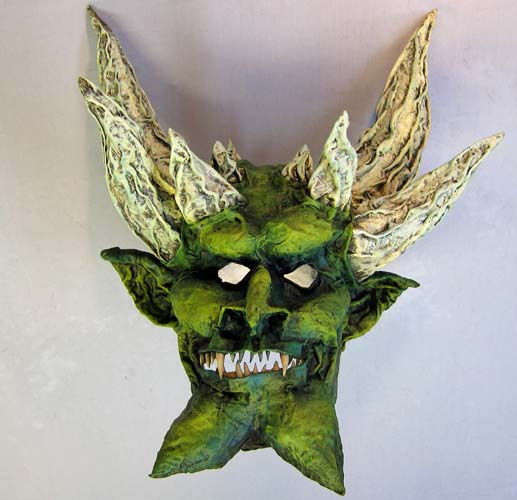
Even more perfectly, the cloth makes for some great horns. For these horns I started with large pieces of cloth. As I wrapped them around the horns I pinched the cloth so that it bunched up lengthwise. I think it made for a really nice effect.
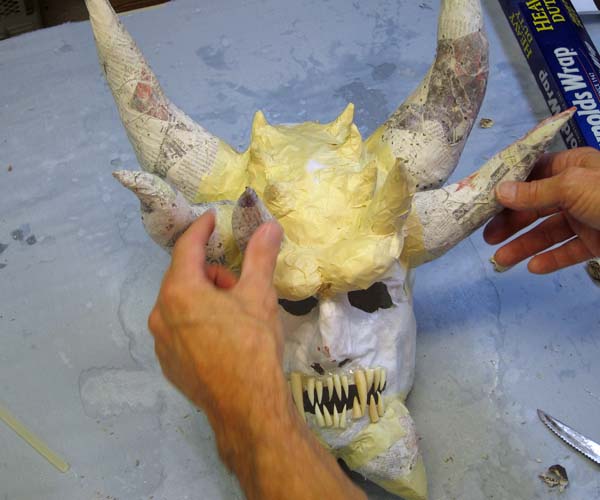
For this mask I used a dark blue paint and yellow. First I put the dark blue into the eye sockets and inside the nose and ears. While it was still wet I added the yellow. It never looked yellow because it mixed immediately with the blue on the brush. I like this way of painting because you don’t get a monochromatic green. You end up with many shades of the final color. For the horns I just added some white to the yellow to get a cream color.

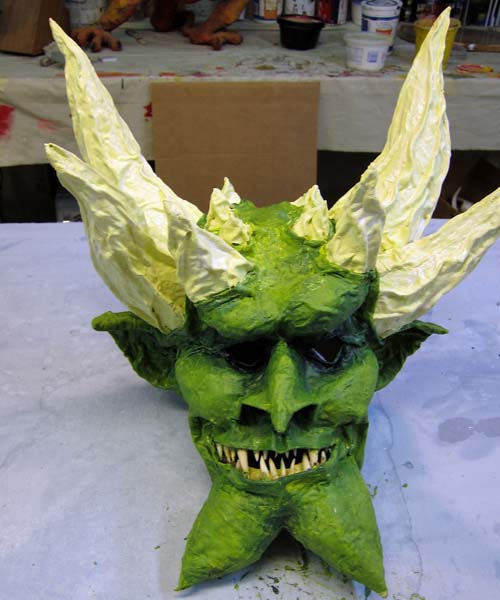
Next, I blackwashed the mask. Just watered down the black, painted it on, and wiped it off before it dried. This worked beautifully on the horns I think. I really like the way they turned out. After the blackwash is dry I always add some color back. I put a little green paint on my brush and hit the high spots. I call this “highlighting”.

I scraped glue and the bits of green paint that got on the teeth. Latex paint will come off polymer clay. Lastly I wanted to make this mask comfortable on my face. While it’s not absolutely necessary I pulled out the wire mess I used in the beginning.

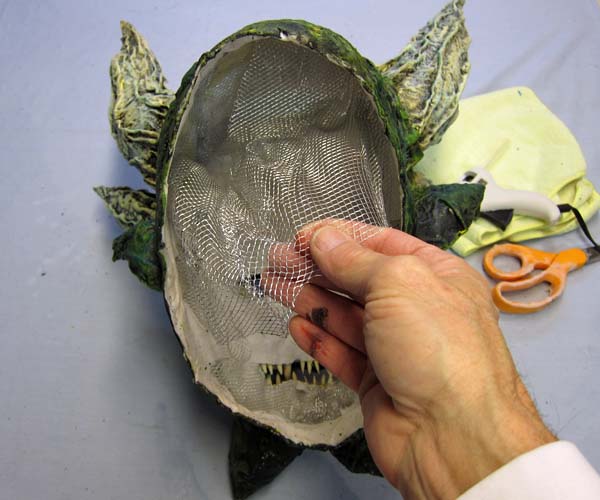
I had an old soft rag laying around that I cut into pieces. I used hot glue to put some strips around the rim. Then I added other square pieces in places where the mask pressed against my face. You don’t need to do the entire inside of the mask. This made the mask really comfortable.


Thanks for stopping by!

https://fbcdn-photos-c-a.akamaihd.net/hphotos-ak-xat1/v/t34.0-0/p206x206/12165811_10205253428230341_591782496_n.jpg?oh=3546a1d8035408a88bc8eaa8075331e6&oe=5622AD78&__gda__=1445111098_0fb9667ae8df4fb860f4e17f4104a90e
Hi, I wanted to know if the mask you made the movie Devil’s staying well I’m in the last step, but not that paint used, the material is Dacron fabric.
very good videos and I really like the final work of all your creations,
a hug.
Hi Sebastian. Your mask is looking good! Have fun painting!
You are so badass!
I’ve recently discovered your fantastic (sure you already know that you’re fantastic) work. I’m now in the process of hunting gathering supplies. Those wire coat hangers have become as scarce as hen teeth. I’m asking all the elderly folks if they have any ’cause the younger ones use plastic. And as for the flour which has also disappeared from the grocery shelves due to contamination I have one bag in my kitchen that is pre-contamination. Bedsheets! Second hand stores in my area are the place I go.
I live in Salem, MA home of the 1620’s witch trials. Come mid Sept the monsters start appearing & by Oct the whole town is creepy. Several years back I made a paper mache Viking ship with a huge dragon mast head. I really like your Wall St Banker & think this is the year for that!
Hello Elvira. Thank you for the enthusiastic comment! Glad you think I’m a badass! I wonder what has contaminated your flour? Of course using it for paper mache is certainly not the same as eating it. You can also just use white glue for the paste instead of flour and water. Sounds like you have some fun projects in the works. Good luck!
Pingback: Halloween Special: Your one-stop wellbeing shop for inspiration on decorations, costume, music, food… | The Wellbeing Specialist
Today is my first time actually learning anything about paper mache, and I was looking into this cause this Halloween my son wants me to make a Toy Bonnie mask for him. I had never learned how to make a mask or seen any tutorial. But I got to your site, and I’m amazed how wonderful paper mache art can achieve through your work.
Thanks,
You are so talented and amazing.
I sure do hope your paper mache can show other’s that there are really no limit.
Thank you very much Huy! I am happy that you bumped into my site! Give it a try. You will love it. Take care
Hola cómo estás soy de Colombia y quisiera saber qué materiales usas y que pinturas que fueras más específico ya que me voy a dedicar a reciclar papel periódico y convertirlo en arte, te lo agradecería mucho!
Hola Cesar. Uso pasta de harina y agua y tiras de periódico, cinta adhesiva, tela (sábanas) y pegamento blanco. Compro ojos de compañías de taxidermia y hago dientes y garras usando Fimo. Pinto con pinturas para todo uso. Nada especial. Solo pintar en la ferretería local. Cualquier pintura a base de agua funcionará. ¡Buena suerte!
Goodd blog post