
Hello everyone. Well, the dust has finally settled on my blog disaster. I’ve finally populated this new blog with all of the posts I thought worth while to save from my last blog. I’ve put them together by project and under the button, “Older Paper Mache Projects”.
Now, back to the young-adult version of Drogon. As I mentioned in my first post I can’t make a full sized version of this dragon like I did when he was a juvenile (http://youtu.be/wSXAgx82EsE). This will be a trophy. I bought a nice walnut plaque. I love walnut.
So much of doing art isn’t very exciting. In fact most of it is “grunt” work. That becomes very evident as I consider what to put in these posts. Most of this post is about several little parts of this project. Nevertheless, I decided to write about them.
I’d had just added the cloth mache on the jaws in my last post. Drogon will be screaming so I need a nice tongue. I have a great way of making tongues. I twist paper (phone book paper in this case) around a piece of wire clothes hanger. I wrap it with masking tape.
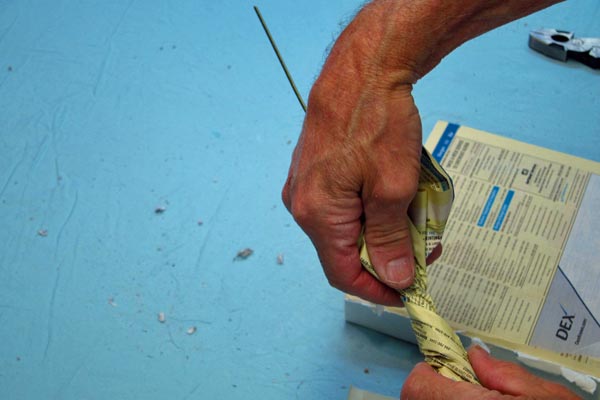
Paper Mache Drogon- twist paper for tongue
I make two of these and lay them next to each other. Then I add a piece of masking tape along the back.
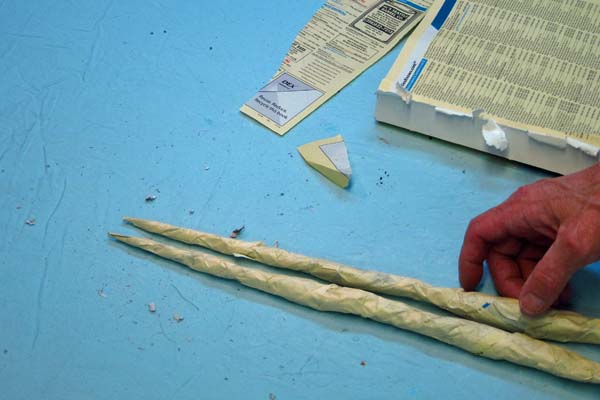
Two halves of a tongue
I bend the tongue into the shape I want. Then I wrap the tongue with cloth dipped in glue. I use a knife to make a crease.

Adding the crease.
I always paint the jaws and the tongue before assembly. Much easier than doing it after the project is put together.  I also blackwash the tongue and the jaws.
 I want to add a significant section of the neck to this trophy so I needed to make one. I started by stacking several wads of newspaper and taping them together.

Wads of paper for neck.
I wrestle with this stack of wadded paper until I get the curve I want.
Then I added the paper mache. I drilled a hole in the back of the plaque. I’ll use this to hang the trophy over a long screw driven into the wall.
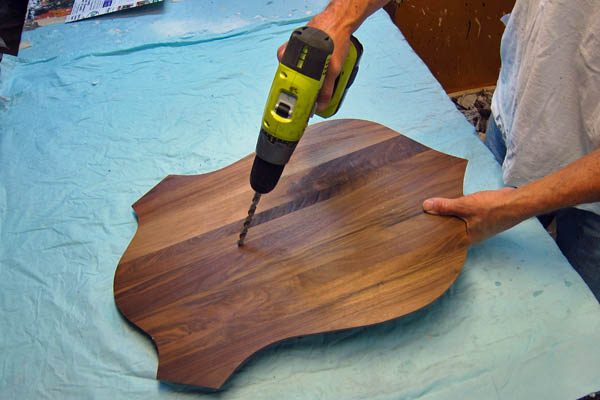 Just checking the neck (after it dried) against the plaque.
  Drogon has many long horns coming out of his cheeks and other parts of his face. I decided to use Fimo for these. I used quite a few packages because some of these horns are pretty large. You’ll notice that they got burned while in the oven. I really like the effect. They are dragon horns after all.
 That’s it for now. Thanks for coming along for the ride.

Glad to see you made it to the other side. It had to be a massive amount of work.
Thank you Willow. I hope all is well with you. Talk to you soon.
I love the burned look! So sad about your blog, all the fabulous video’s and hard work you did… Going to miss seeing one of my favorites, the dancing marionette one, are those still on you tube at least? Thanks Dan!
Hey Sue. All my videos are still on Youtube. And my regular site (www.GourmetPaperMache.com) wasn’t affected. It was just the blog I lost. My little dragon marionette video is still there. Thank you for caring about it. And thanks as always for your support and nice remarks. I really appreciate it.
Great you’ve sorted out the blogging problems! I love the look of the burned horns, what a lucky effect! Go Drogon!
Hi Carol. Thanks for the note. I think this is going to work out fine. I’ve spent some time working on another trophy that may or may not see the light of day. It is kind of experimental. I’ll let you know how it turns out. See you!
There is indeed a lot of grunt work, especially with paper mache which tends not to look like anything much in the initial stages. But I think it makes the whole process that much more satisfying in the end.
Yes, I know you know exactly what I’m talking about. And you are right. It does make it more satisfying in the end. I’ve spent all day doing parts and parts within parts of a new project. It’s got to be done.
Very nice as usual. I hope you are recovering from the web commotion!
The teeth look great but that stuff really smells when it gets that cooked. Did you bake it in a toaster oven outside?
Lori
Hey Lori. I have recovered from the blog mess. It took a few days to put up all of the posts I thought people would care about. I do like this WordPress blog much better than the product I was using. It’s much easier to use and it has a cleaner look. Yes, that much polymer clay baked at one time was really smelling. I just use the oven in my kitchen. I use an exhaust fan while it’s cooking which helps a bit. But there are sacrifices to be made for art, right?
See you.
Would be nice to see how you make the horns teeth and the eye, or do you buy the eye already made? The reason I am asking is I am just getting started and I am 74. I know a little late but never too late (I hope).
Hello Mary. I make horns different ways. I use a lot of polymer clay like Fimo or Sculepy. Sometimes I’ll make a big horn using only polymer clay by just rolling it. Other times I’ll stretch it over aluminum foil that I have crushed into the basic shape. That saves a lot of clay. But I will often just make the horns out of the same twisted paper covered by masking tape and then my “cloth mache” the same way I make fingers and toes and tentacles. I buy my eyes online from taxidermy companies. You can also buy “blank”, just the glass shell that you can paint yourself. Good luck with your project! And I’m 67 going on 74. It’s not too late for anything.
A small question, how do they make the teeth of the dragons or do they buy them?
Hello Ellen. Sorry, just now seeing your question. I make teeth and claws out of polymer clay. Brands include Fimo or Sculpey. You can find it at any hobby supply store or online.