
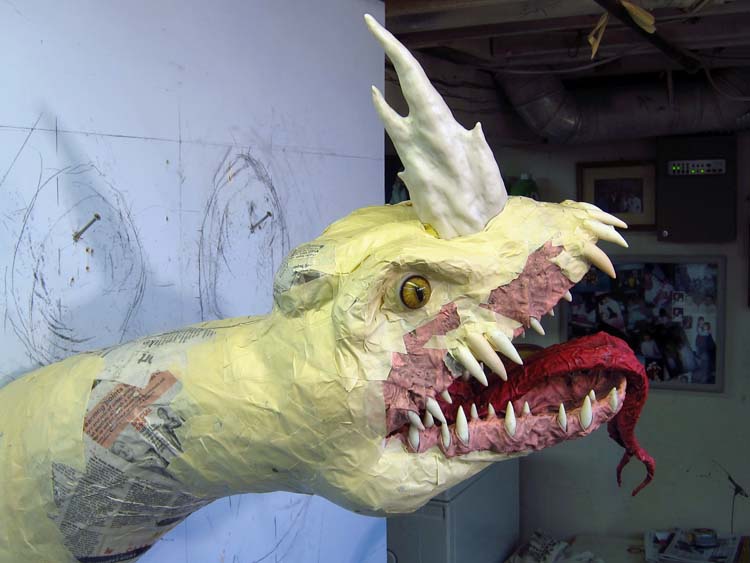
Hi again. So here is Tiamat dragon number four, the Blue dragon. This one is characterized by the big, prominent horn sticking straight up from the nose. Kind of cool. And it has a more squat, kind of short face. Very different from the other dragons.


In the paintings he also had buck teeth on the top, six very prominent teeth jutting out. I didn’t notice those when I made the jaws, but it was easy enough to fix. I pulled out the teeth I had in the front of the top jaw, then replaced them with six bigger ones.


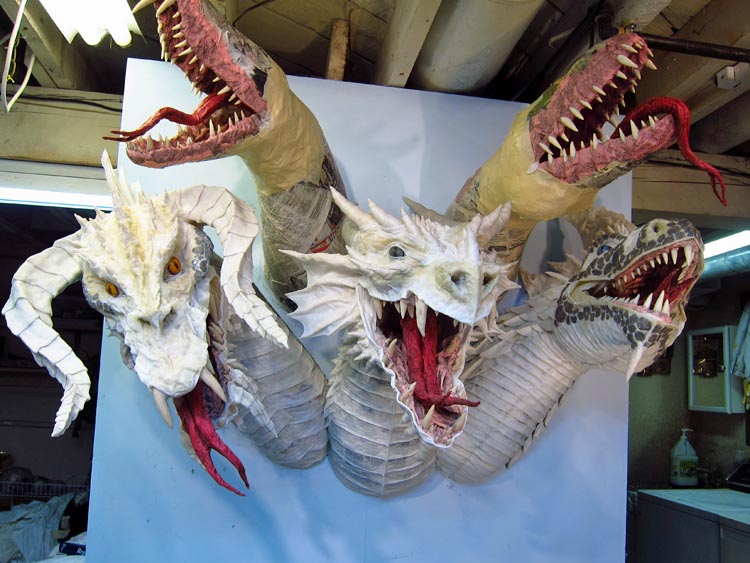
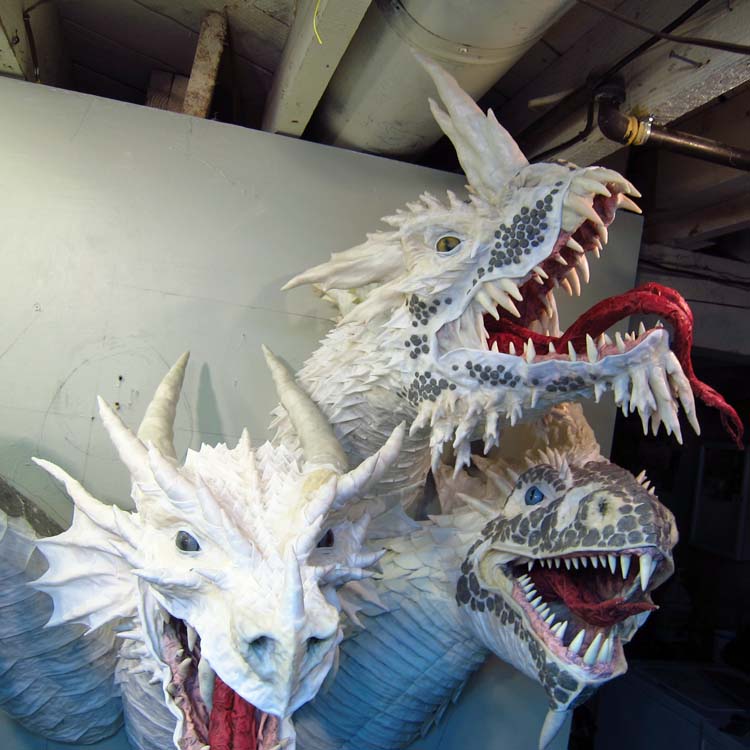
One quick check of how he (she?) would be positioned with the other heads. The two top heads are going to crowd the bottom three a little bit. I want to minimize that as much as possible. I’m also trying to stick to the size constraints I was given by the people at the restaurant. And, the two top dragons must fit on either side of the two large horns of the Red dragon (it’s hard to see in this photo). All part of the challenge of this project.
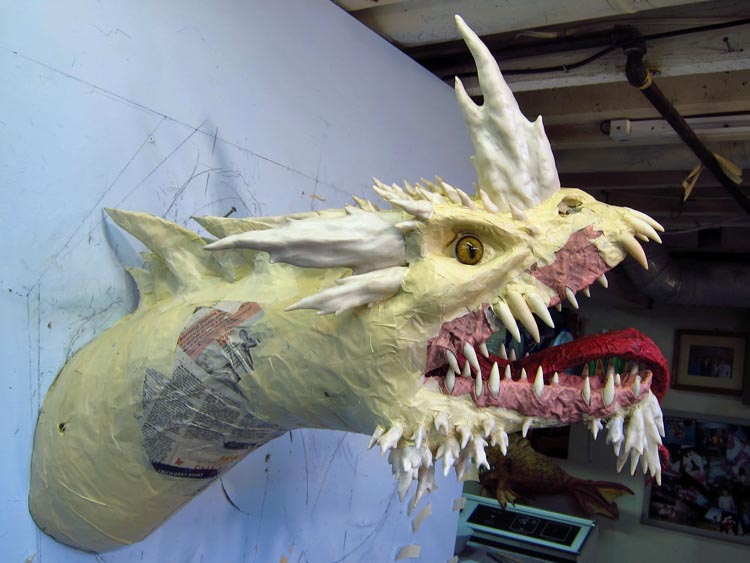
I started with the big horn. I must say that I’m very pleased with my rendition of this horn. I made all the other horns for this dragon similar to this big one. Note that I also decided to pull a couple more teeth on the side of the jaw forward (outward). I used a paper mache shell to start building up the head.

I made a brow and added the eyes. I choose some yellowish eyes for the Blue dragon. I think they will look nice with the blue color.
When I looked at the wallpapers it was hard to tell what was happening at the sides of the head. There were structures that almost looked like ears. But there was no mention of ear-like structures in the literature (like there was for the Red dragon). I just decided to use more horns to make these structures. I made them similar in shape to the big horn on the nose. I’m happy with this interpretation.

I added many more horns to the chin, jowls, and the top of the head. And I added some pointy things along the spine. I also made some nostrils just in front of the big horn. Overall, I think the face captures that squatty (not sure how else to say that) look I saw in the wallpapers. So time for the cloth mache skin.
I added breast plates and lips.
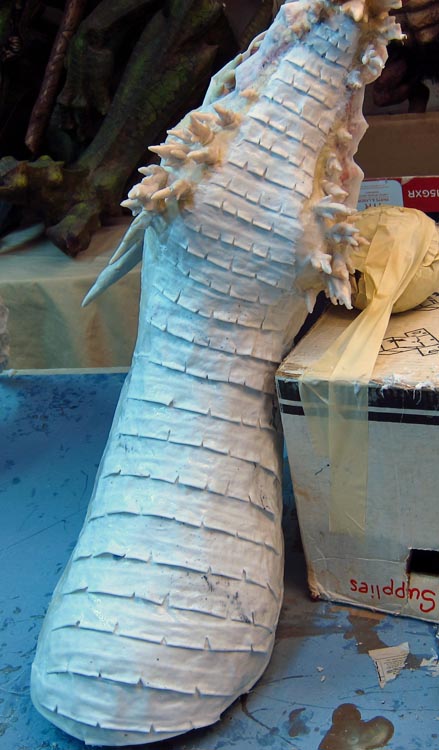

I filled in the nose, added eyelids and scales. I made these scales somewhat like the White dragon’s scales, but smaller, more sleek, and pointy.

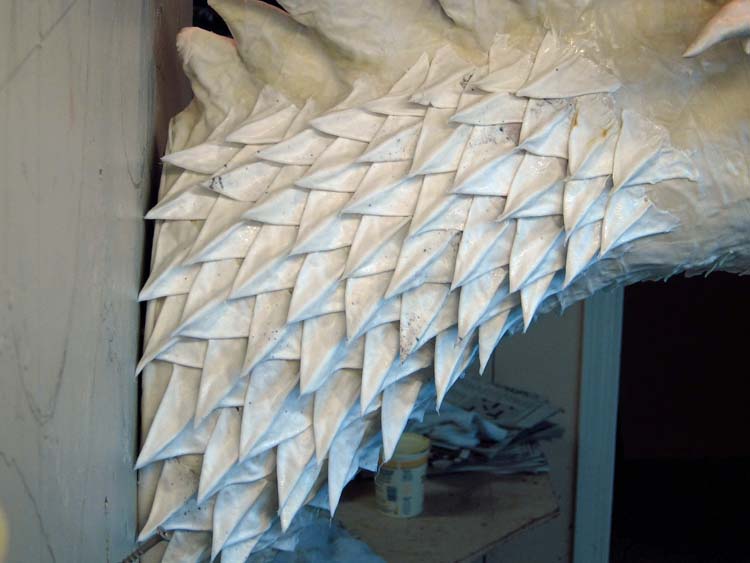
I wanted just a little more detail on the face. So I put some small scales on the cheek bones, and added some of my spit wads.
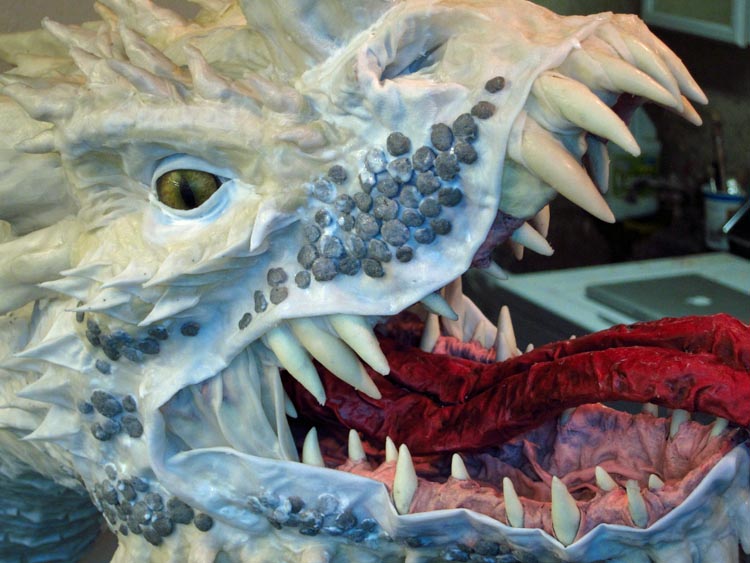
So here is my version of the Blue dragon before paint.

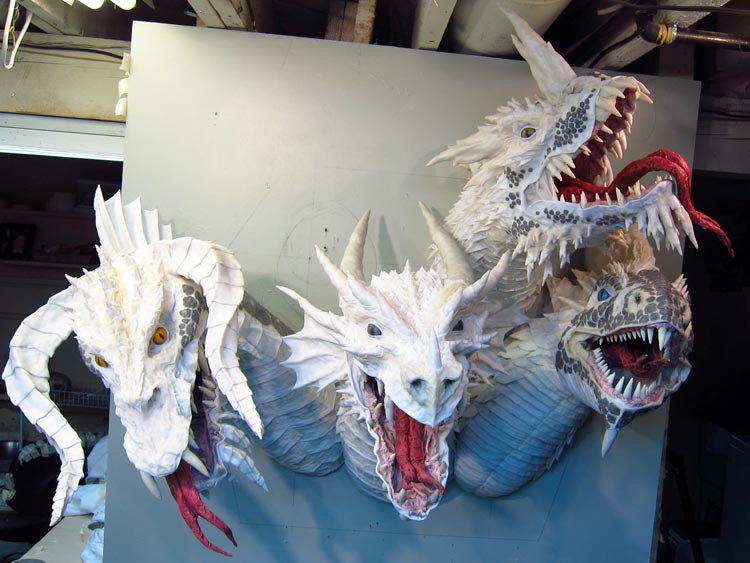
Here he is with the other heads. It looks less crowded in person. Overall, I’m very happy with it.
One last view.
One more to go, the Green dragon. I’ll be back soon with that. Thanks for stopping by!
** Addendum! Well, Amy just sent me a link to a book that shows more detail than the wallpapers I was using. In fact, now that I saw this other book, it seems clear in the wallpapers as well that this Blue dragon is supposed to have ears. Not horns. So…. today I’ll be making some revisions to this dragon. Off with the horns and on with some ears. Of course I’ll share those changes later.

Amazing! Each one is just so magnificent! You seem to be moving along so quickly on this project so I am presuming you did not do any of those cool videos of parts of the build that I love to watch? You know those edited and speeded up versions, for example, when you added scales to one of your dragons.
Hi Kat. I am shooting video of all of this. It’s always a bit annoying trying to work around camera shots. Sometimes I want to just work without worrying about what’s in the shot. But I do like to make those videos. This is going to be hard though because those videos have to be around three minutes for anyone to want to watch. So this is going to be a real challenge with five heads involved. But I have an idea of how to approach it. Anyway, I am going to make a time-lapse video of this.
This is starting to look more and more fantastic as you go, Dan!!!! Love the dragon dentistry! 😉
Thanks Diane! I’ve really enjoying this.
he should have ears! looks great but he needs some big ears. what book are you reading for the extra detail?
http://earthofshadow.ucoz.ru/_ld/0/8_draconomicon.-..pdf page 39. best book ever. love my DnD dragons
Yes, now I see what that those are supposed to be ear-like. I wish I’d seen this photo earlier. It’s much harder to see on the wallpapers. Hmmm, might have to change those. Thanks!
Okay, so now I can see it all clearly. I’m going to add those ears. Thanks for the head’s up Amy!
No problem! Thank you for listening 🙂
Actually, sending that PDF was a life saver. The drawings of all the dragons helped clarify other things I couldn’t see very well, like the back side of the white dragon’s crest. It is part of a big fine (spine). So I’m going to fix that as well. Even the Red dragon… I didn’t realize it had a spine at all. Now I see that it has one. Mine won’t be quite as cool as those drawings, but I’m pretty happy with the other parts. I’m actually more happy with my Green dragon than the drawing. But now I know that I haven’t messed up anything major. So thanks again! This was the perfect time to see this. It would have killed me if I’d finished before seeing these.
no problem at all. im a bit of a dragon nerd and watching these come to life is wonderful. so glad i could help and i hope i haven’t mucked up the process to much. good luck 😀
Dragon nerds are my kind of people. I’ve always said that this medium is “forgiving”. This is exactly what I’m talking about. If this were metal or stone, or even clay, it would be impossible to fix. But as I mentioned in my posts, I consider everything subject to change as I work. I’ll finish the changes I made today. I’m very pleased with them. I really appreciate the help.
I’m using the official Dungeons and Dragons wallpapers, Tyranny of Dragons -set 3, http://dnd.wizards.com/articles/media-resources/wallpapers#submenu-title
Amazing dragons! I admire the extent of your imagination. They look like so alive. Congratulations!
Thanks Terzi!
Awesome work Dan. I love your thinking and decision making as you go along. They look truly fantastic and your detailing is terrific. I was browsing your website hoping to find the answer without asking but don’t see it: where do you source your eyes from? I can’t find anything appropriate online for dogs or cats or dragons! Love your videos and appreciate how much work they are.
Hi Greg. I buy my eyes from taxidermy companies. I don’t have a particular preference. I use them all. They all offer slightly different kinds of eyes. If you just google, “glass eyes taxidermy” you’ll find all the companies I use.
An alternative to buying taxidermy eyes is to make your own. Have a look at https://www.youtube.com/watch?v=OgP6IFT137k
I bought glass cabochons from Amazon, and liquid acrylic paints in various metallic colors from a local craft store.
I’m sure the ones I made aren’t as detailed or as authentic as the ones Dan uses (Hi, Dan!), but painting them was one of the most fun parts of the project, when I made my “simple screamer.”
I ended up gluing the eye disks to spheres of polymer clay to make them into proper, three-dimensional eyeballs. That made the overall shape better when I was constructing the head. Good luck! Have fun!
Thanks for the tips Elizabeth!
This piece is looking great! I was wondering though, did you make the prominant horn on the blue dragon out of Fimo like the black dragon’s horns or did you create a structure underneath and cover it in cloth mache? Keep up the great work too!
Thanks Grumpmeister! Because these horns are so big, I used aluminum foil underneath. I made the basic shape, then added the Fimo over the top.
Boa noite Dan, seu trabalho é muito, muito fantastico sou artesão também gostaria de saber que tipo de de material utiliza para as escamas, e a forração que utiliza, você já disse que é tecido mais que tipo de tecido “algodão, tnt, qual??”. Obrigado e desculpa pela pergunta mais venho tentando fazer mais não chequei ao material exato.
Olá Claude. Eu uso lençóis velhos para meu tecido. Eu mergulhe-o em cola branca. Obrigado pela nota.
Extraordinary, as always, Dan! Such an inspiration to a poor UK teacher!
Thanks poor Pennie! I taught for 40 years. Thank you for what you do.
Really beautiful work here Dan but I sure don’t envy the poor soul who’ll have to dust it once it’s in the Restaurant lol.
Hey Dave. That’s too funny! I have many to dust around here. I only do it when someone is coming to shoot photos. It’s never too bad. Take care
This is a magnificent piece, Dan. The best part is that you say you’re having fun doing it. It shows!
Halloweeen is almost here! My gargoyle, Jean-Claude, will again grace our front door, back-lit in red!
Thanks Elizabeth. It’s great to hear that Jean-Claude is doing his job! Happy Halloween!
You are just unbelievable! This sculpture will knock them silly. Can’t wait to see the green dragon. I think you did the blue one very close to the photo. Yes squat would be a shorter nose.
Thanks Ralph! Glad you like them!
No matter how many times I see your work, it always amazes me. This is coming along brilliantly!! Can’t wait to see the finished piece
You are very kind. Thank you! Glad you like this project!
Your dragons are amazing! I am so inspired. I love the step-by-step formation of each character. You make this former dragon artist want to be a current dragon artist again. Thank you for posting!!!!
Hi Marie. Thank you for the note! I’m happy to hear that you are inspired. I hope you pick up the medium again. Take care
I have to thank you for all the knowledge and inspiration! I found your blog and videos quite some time ago when looking for Halloween ideas. Paper Mache was the perfect answer for what I was and seeing what you could do with it amazed me. I’ve used your cloth mache technique to skin many of my costumes since it gives such an organic look. I’m looking forward to trying that on future projects. Thanks again for doing what you do. I’ll make sure to send you a picture when I finish. As always, I always come in just before deadline! Halloween awaits!
Hello Dave. Thank you for your kind remarks. I’m very happy that I could be of some help. Good luck with your pieces. I’d love to see them, and post them on my site if you are interested.
Very, very, very, very nice!
at work trying to make a generic dragon for my grandson, experiences and stumbling, and adapt the materials here in Rio de Janeiro, let me follow, with even more respect and admiration for your rich work! I like it when you say it’s fun, and I agree, but take a lot of work! I wish the owners of the restaurant, so happy, you pay at least twice the combined!
Congratulations also for your tremendous generosity in sharing, very clearly, “your doing,” that is something only true masters are happy to do because there’s always more to discover in this way the arts!
For your generosity not meeting the qualifying time!
Congratulations once again!
Hello Ivonesio. Thank you for the nice note! I am very flattered. I am glad I could help. Good luck with your art!
Take care
Wow, looking great!
Thanks again Angie!
Woow, this is looking fabolous!! And you know what I love that wouldn’t have imagined before? The recessed upper lips of the blue dragon. I love it!! 🙂
Thanks Nacho! I’m very happy you like this one.
I’m sorry if this question has been asked before. What are you using to make the teeth and horns? I’m just learning more advanced paper mache projects. I really want to make an open mouthed pumpkin and have no idea how to make the teeth.
Thank you
Hello Celeste. I use Fimo or Sculpy to make the teeth and horns. It is polymer clay. Any hobby supply store would have it. Good luck!
Awesome! Thank you!
Wonderful job. Could you please tell what kind of paint use to paint to dragons?
Best resgard,
Ivan Hauptman
Thank you Ivan. I use all purpose paint that I buy at the hardware store. As long as it’s water based any paint will work.
Thanks a lot for the help.
You are very welcome!
I really like this one! I think you’ve captured the look of it really well with the horn and the short, robust face. With the new teeth it reminds me a bit of those crazy-looking deep sea fish. It’s a shame you have to re-do its ears, and I quite like what you’ve done with the extra horns, but I guess that’s how it goes sometimes. One of the nice things about paper mache is it’s so easy to change things halfway through the sculpting process if you decide you want to.
Thanks Stella. I don’t know why I didn’t see those protrusions as ears. But I’m glad Amy sent me that pdf. They are very strange looking ears, but cool. I made some that look very close. I will re-post that photo after it’s painted. I’m glad I saw it now, rather than after I’d finished. Overall, he looks really good now.
Thanks Stella! Actually, the new ears look better than the extra horns I think. It draws more attention to the big horn on the nose. And you are so right, I love this medium because it is “forgiving”. I love being able to make changes. Can’t do that with clay or wood or stone.
WOW! You are simply amazing. I would so like to learn your techniques. I sculpt with epoxy clay, but after seeing your videos, I’d love to learn paper mâché.
Thank you Carol! I’ve never used epoxy clay. Thanks for the nice note. Yes, give this a try. I think you will like it. Good luck!
Cool…..question: how did you make those horns,teeth/fangs?
The teeth are made out of Fimo, a polymer clay. I also used Fimo stretched over aluminum foil armatures for the larger horns.
Can’t wait to see them all finished.