
Okay, there are a couple of things besides horns I should discuss, like how I hooked up the lighting. But I promised horns on this post, so that’s what I’m showing. I’ll do other posts later about the lights and switches etc..
I know it’s been quite some time since I last posted. That’s because it has taken a long time to put on these horns, particularly in combination with the lights. Speaking of lights, I took a big risk by adding lights under many of the horns. They are either going to look great or completely hokey and terrible.
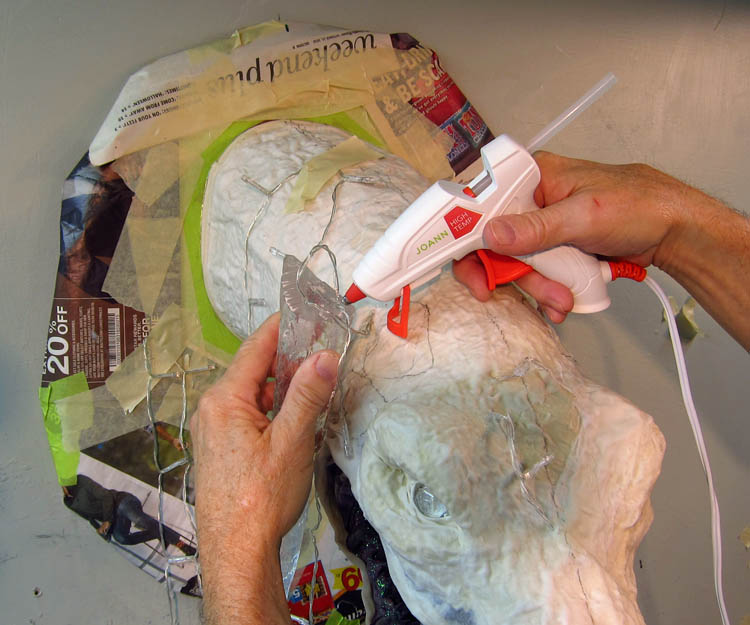
For the biggest horns I drilled holes in the base.

I inserted the lights as I attached the horns. I used lots of hot glue for that.
I added the biggest horns first.

Then smaller ones.

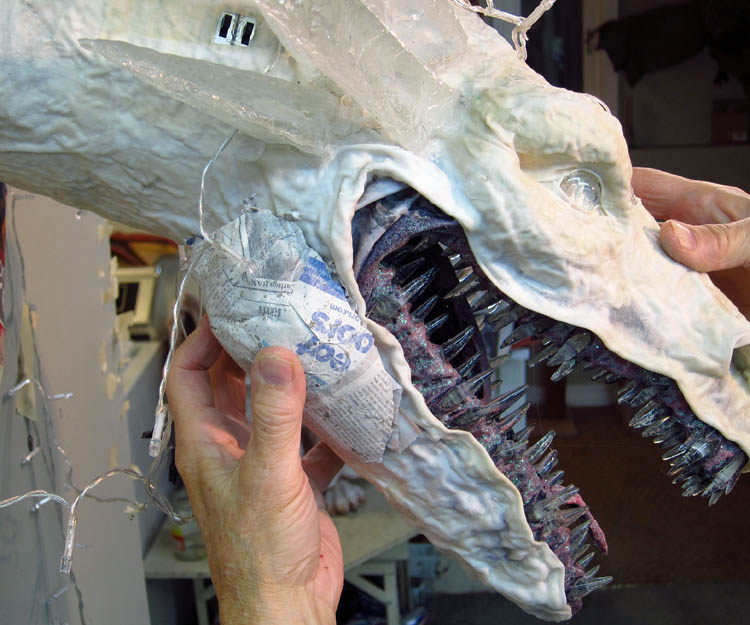
At one point I stopped to add some jowls at the back of the mouth.
Then I added more horns.

And more carefully placing lights under many of them.

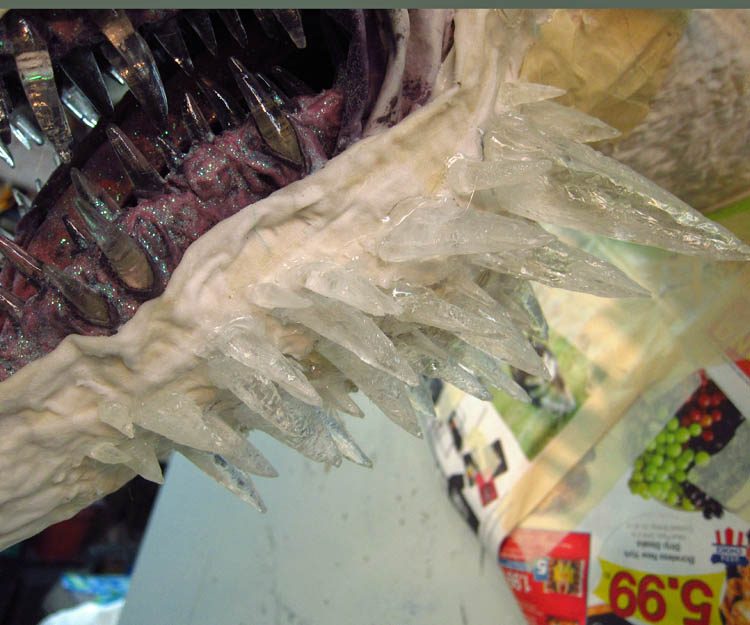
The trick is learning when to stop adding horns. I have to say that each horn was carefully and deliberately placed. A lot of compulsive putting one on and taking it back off went on behind the scenes. These horns were also not easy to cut. I used a jig saw with a blade made for plexiglass to cut them.
Of course I also added horns to the jowls.

And a few more.
Here is what it looks like now with the lights off. I must point out again, that 99% of the time this project will be displayed with lights off. It has to look good without lights.

I made sure that the lights under the horns were on seperate circuits from the eyes and the mouth. That way, if I hate the way the lights look under the horns I can just turn leave them off. Here is the dragon with the lights on only in the mouth and eyes.
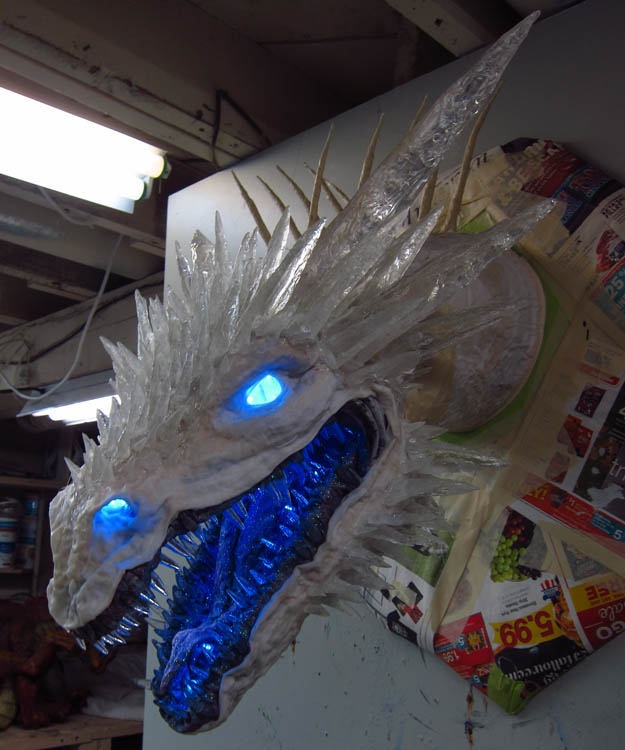
And here is one with all the lights on.

Not sure how I feel about them yet. We’ll see after painting how I feel about them.
Either way, you’ll notice that the horns are a little hard to see in the photos. That’s the downside of icicle-like horns I guess. But I like them nonetheless. So far so good.
More later. Thanks for stopping by.

What are the horns made from? And I do not think it looks hokey, at least from the vantage point of my phone.
Btw, I’m making my first dragon 🙂
Thanks Tory. The horns are made from clear casting resin. Glad you think the lights look okay. Good luck with your dragon!
Think it is absolutely awesome! Love your work!
Thank you for sharing
Thanks Cary. You are very welcome!
He’s GORGEOUS!!!!
Thanks Lynn!
This dragon is really shaping up, can’t wait to see the final posting! Love the blue LED Lights.
OMG It looks great!! The resin really looks like ice, and the lights are perfect!
Glad you like it Debbie! I think the horns look good.
I’m sure it will look great once you’ve painted the face, I look forward to seeing that.😊
Thanks Cath!
Looks fantastic…can’t wait to see the finished version!!
Thanks Martina!
OOOhhh She is really coming along nicely..
Thanks David!
I always look forward to your posts! This is incredible! I think you’ll love the lights. I can hardly wait to see the final project.
Thanks for sharing!
Thanks Nina! I’m happy that you like the project so far.
WAY COOL!!!!!!!!!!
Thank you Kathy!
WOW!!!!!
On Thu, Dec 13, 2018, 5:37 PM Gourmet Paper Mache Blog danmonsterman posted: “Okay, there are a couple of things besides horns I > should discuss, like how I hooked up the lighting. But I promised horns on > this post, so that’s what I’m showing. I’ll do other posts later about > the lights and switches etc.. I know it’s been quite” >
Thanks Debi!
I think the lights in the horns look absolutely gorgeous. This is going to look great when it’s completed!!
Thank you as always Mark! Glad you like how this is going.
I think the LEDs in the horns look great, but to some extent they do take attention away from the lights inside the mouth and eyes so I can understand why you might have mixed feelings about them. Putting the two sets of lights on different circuits was a clever idea, it means you’re covered no matter what you decide you prefer. As I say, I like the horns with lights under them and will be interested to see how they look when you’ve got everything painted.
Using aluminium foil to mould those horns really was genius, they look exactly like they’re made out of ice.
What a crazy amount of work there Dan! But WOW, those horns (and teeth) came out amazing!!
Hey Sue. Yes, it always ends up more involved than I intend. I expect it to happen. The worse part was that I was using my knife to cut away some hot glue that dripped and I accidentally cut some of the little wires underneath. All of a sudden one of the eyes did not light up when I flipped the switch. I used the knife to trim in many places and I was afraid that I’d have to tear it all off and start the horns over again. Luckily I found the spot I cut and was able to splice the wires. Oh well. Such is art!
Wow, That was so lucky! Having to tear apart a complicated project like this would have really been tough, so glad you found it early! And good thing you had enough slack to splice! Yep, seems every darn major project, no matter art or home projects ALWAYS always takes longer than planned. so onward!!!
PS…Sure miss the kitty shots, hope to see them a little more often! (maybe in the video? if there is one) 🙂
Hey again Sue. My two kitties are still around. They just haven’t managed to get in the shots lately. I’ll have to make sure to catch them in the act when they do get involved. I’ll tell them you miss them though.
Beautiful. I am not doing so much paper mache now, except as decoration on the journals I sell at a gallery, but I love seeing your work. It is wonderful. . I don’t have room any more to do it but admire your ice dragon.
On Thu, Dec 13, 2018 at 2:37 PM Gourmet Paper Mache Blog wrote:
> danmonsterman posted: “Okay, there are a couple of things besides horns I > should discuss, like how I hooked up the lighting. But I promised horns on > this post, so that’s what I’m showing. I’ll do other posts later about > the lights and switches etc.. I know it’s been quite” >
Thanks as always!
Ciao Dan, e bellissimo il drago di ghiaccio e da un paio di anni che ti seguo e cercando di imparare la tecnica della cartapesta come fai tu.Ho eseguito il mio primo drago che ti invierò appena mi è possibile e spero in un tuo commento. Grazie Valerio.
Ciao Valerio. Sono felice che tu abbia gradito le mie opere e creato il tuo drago. In bocca al lupo!
Potrei sapere cosa usi x indurire la carta e la stoffa? Grazie
Uso la farina e la pasta d’acqua con il giornale e colla bianca con il panno.
Very nice bloog you have here
Thank you very much Gail! I don’t add to it much anymore.