
Hey all. While I was working on my dragonfly from hell, I was also making a commission. It was the project that was keeping me sane while I was struggling with the dragonfly. I guess I’m just built to make dragons. Over the last few years I can’t tell you how many requests I’ve gotten to make Smaug from The Hobbit. I resisted for a long time because I preferred making my own dragons. But after making the Taimat trophies I remembered how challenging it was to work from someone else’s renditions. That was certainly true of this project. It’s hard trying to match a Hollywood digital version. But the challenge was part of the fun. And it turns out that I got just the right request for this dragon as a commissioned piece. So here it is.
I intend to add the blog posts post-completion this time. I didn’t want to start blogging about this dragon and, like with the dragonfly, decide that I hated it and wished I hadn’t started writing about it. But I’m happy with how my version of Smaug turned out. So I’ll add some posts now. I’m also making one of my time-lapse videos of this build. It will be done today (knock on wood). I’ll add an addendum to this post with a link when I’m finished. Actually, I finished early! Here is the video, https://youtu.be/QuCyQNz9JhU
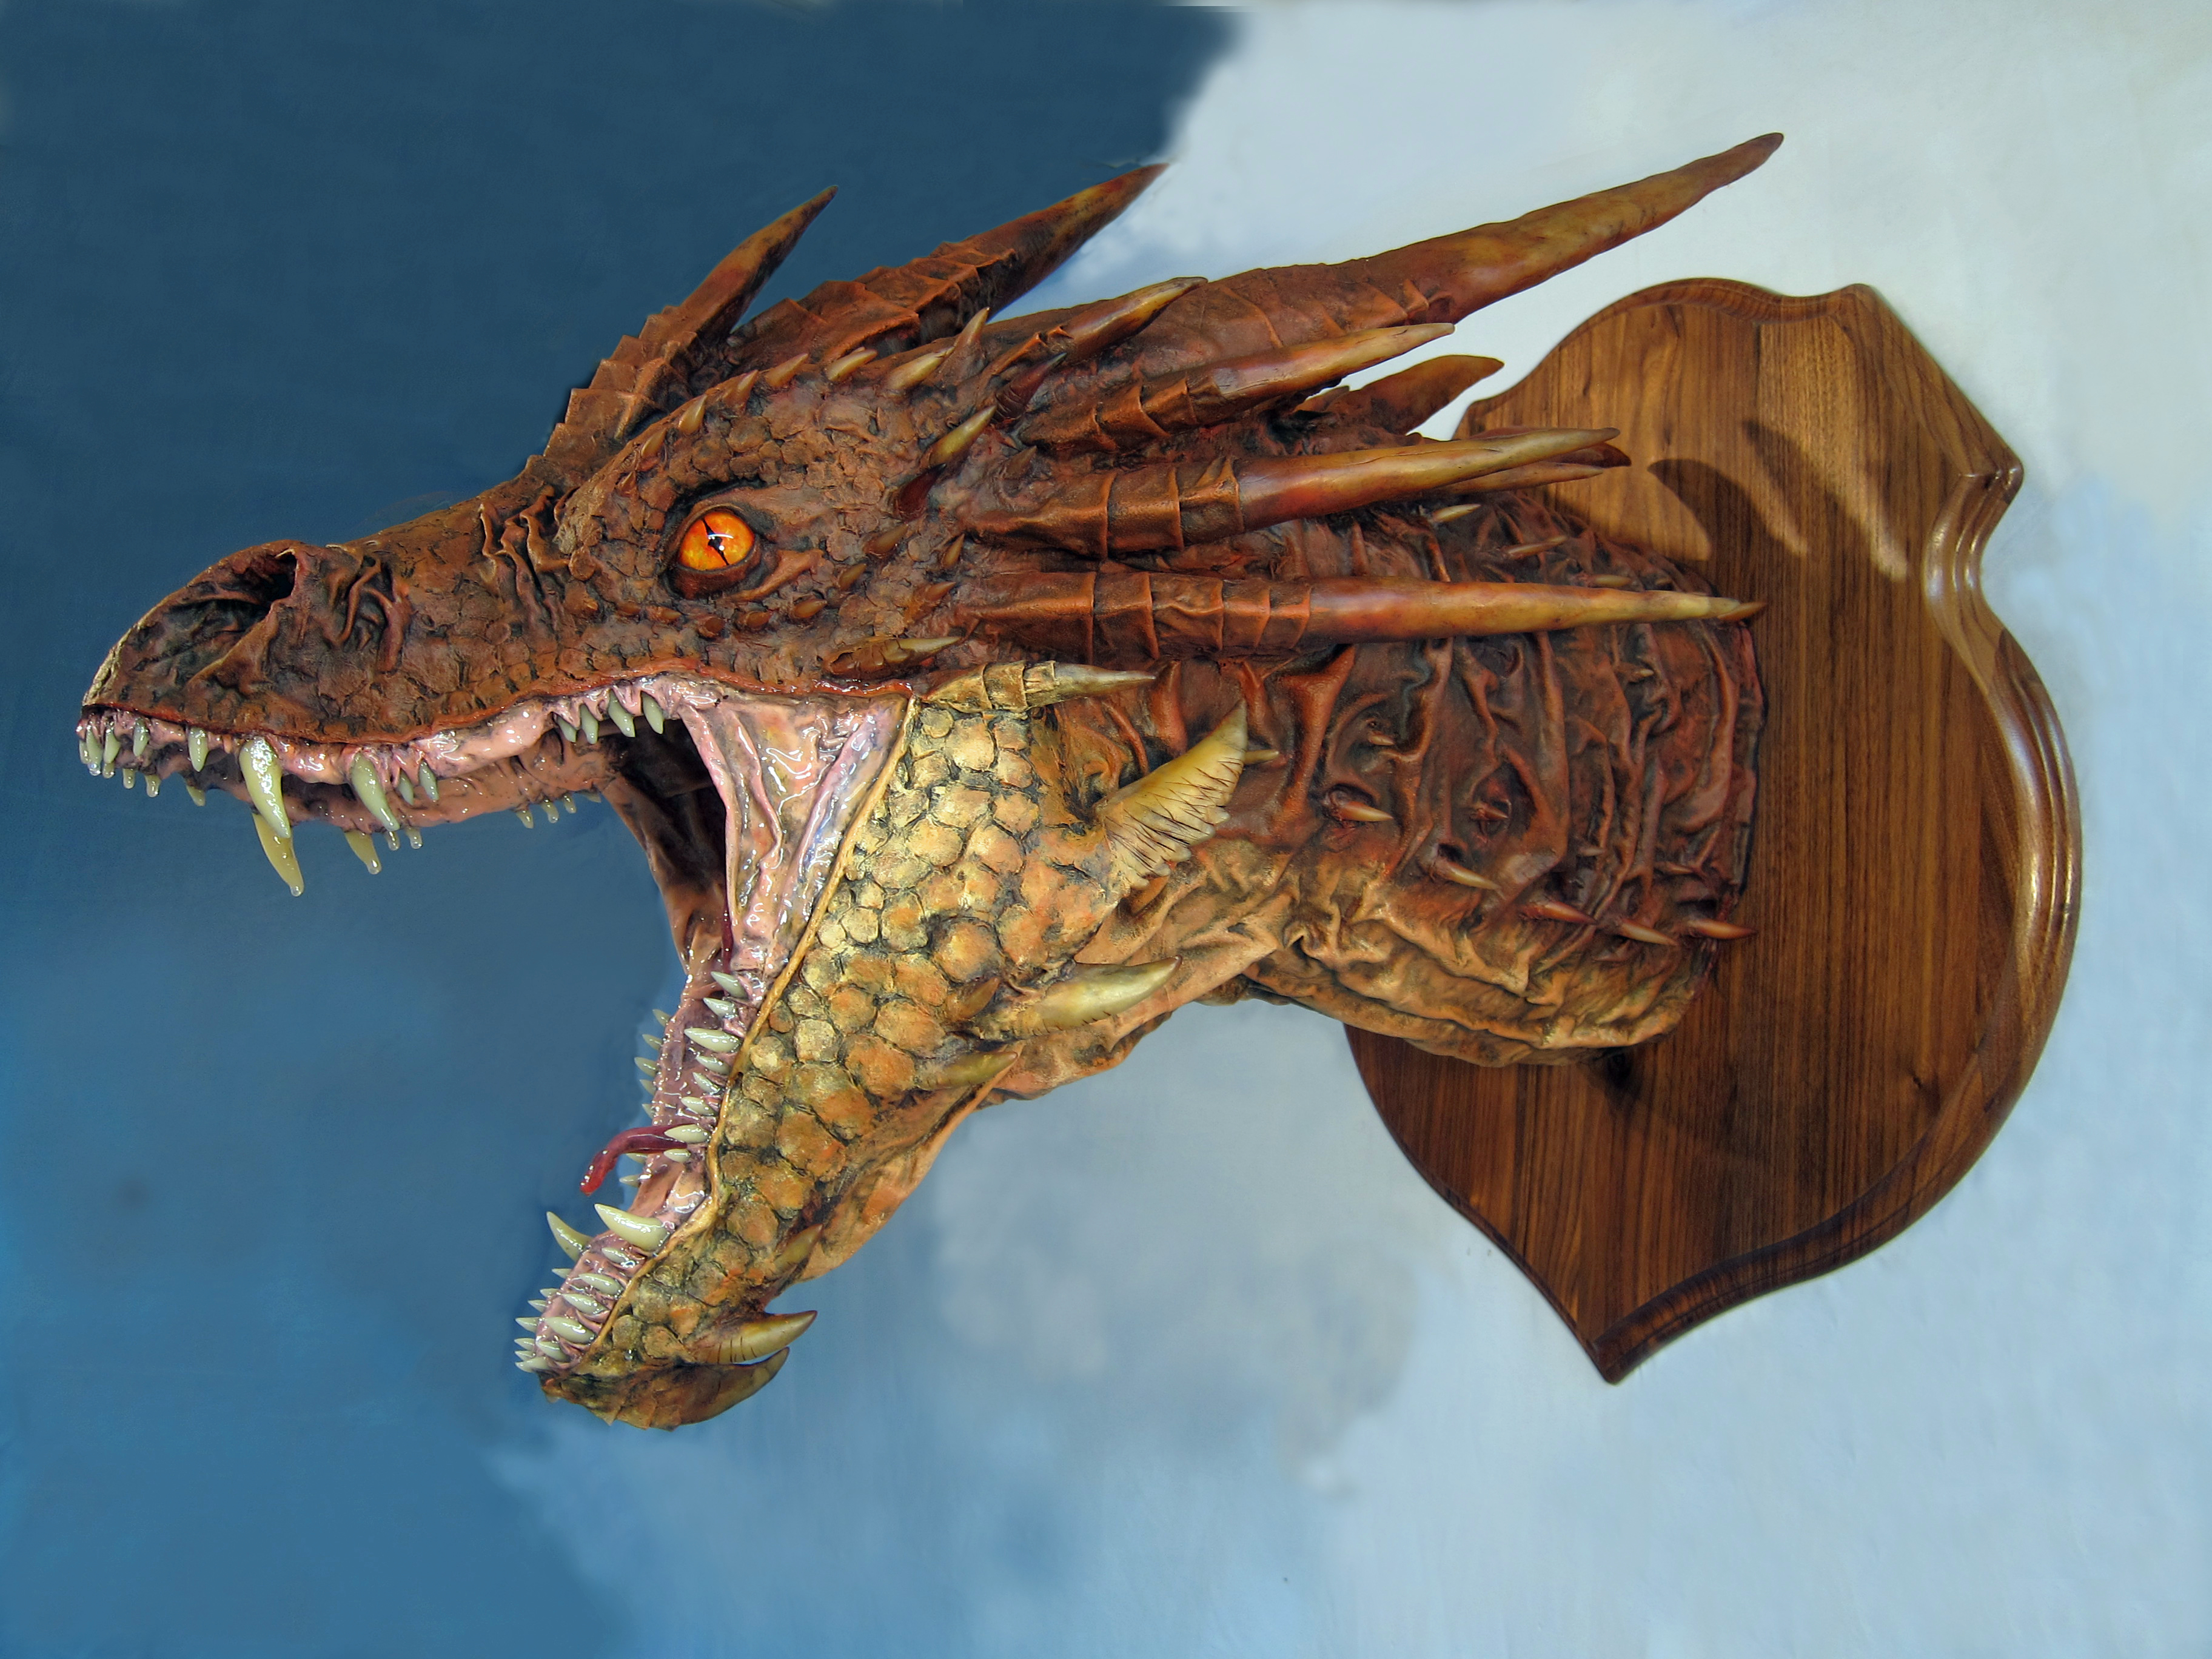
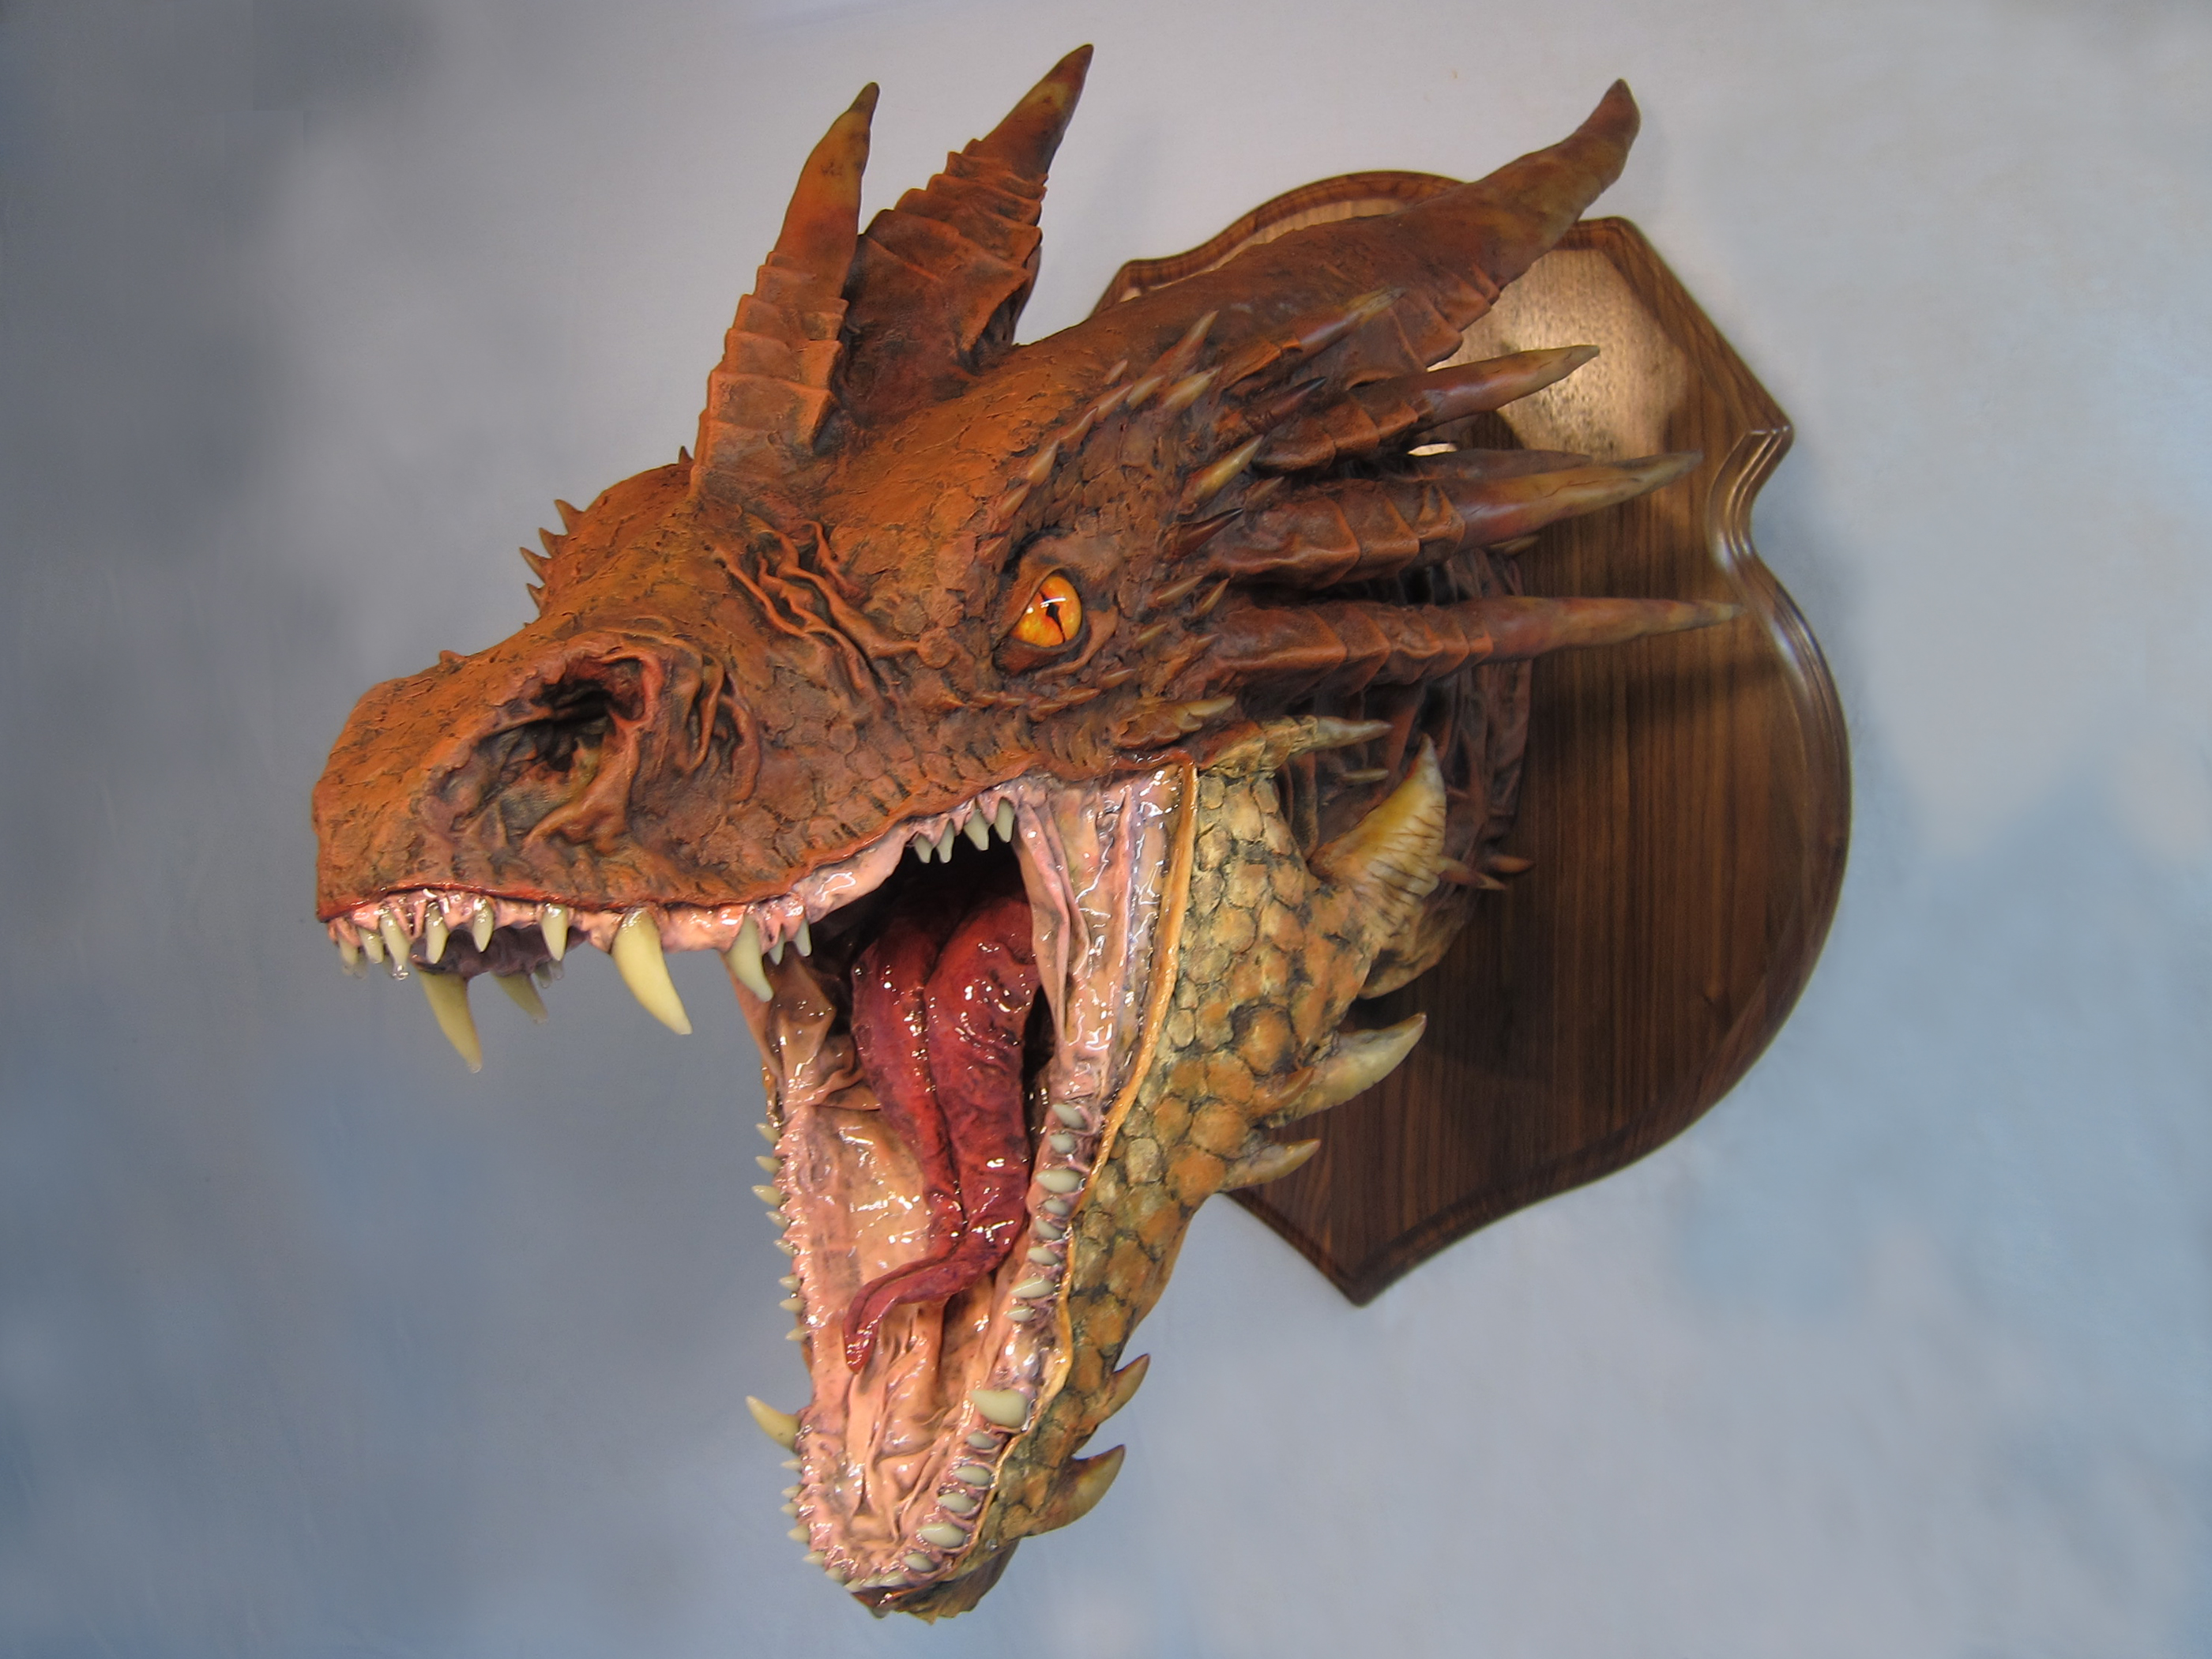
Here is the finished piece from the side.
This time I used Elmer’s glue for the initial paper mache. Not for any particular reason. Well, that’s not exactly true. I didn’t have any flour and didn’t want to go to the store.
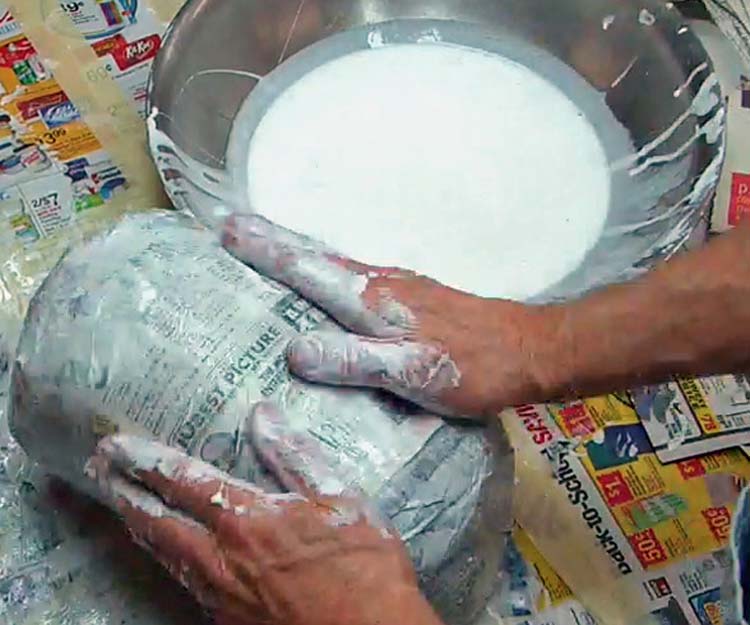
Using white glue for the mache makes for some very nice shells. They are very hard, but also very brittle. They break if you try to bend them into a slightly different shape. This is never a problem with flour and water, which I prefer.

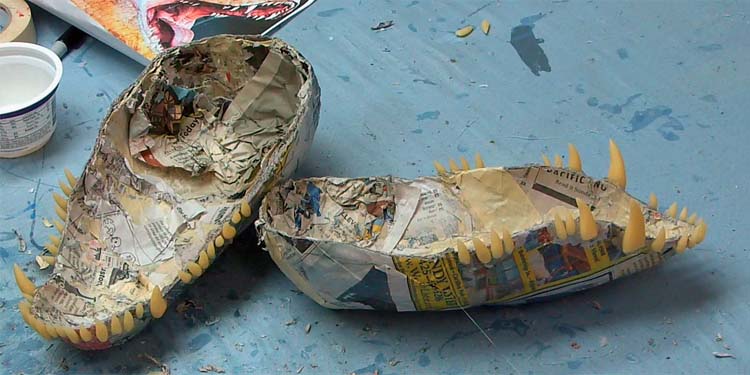
As always, I start with the shells for the jaws. I used a photo of the Hollywood Smaug to model the teeth and to guide in their placement.
I’ll add more later about the jaws in another post. But first, I want to focus on the tongue. I really wanted a great tongue for this project. I always begin making tongues by twisting newspaper around pieces of wire clothes hanger, and wrapping with masking tape.
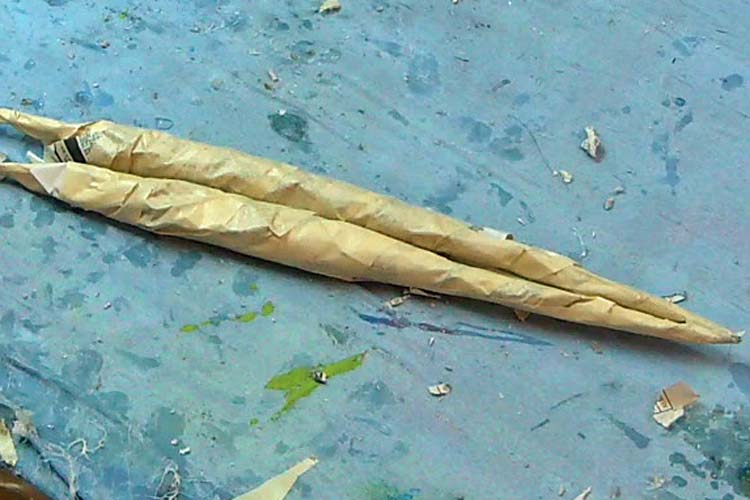
The wire allows me to bend the tongue into any shape I want.

In this case I added extra paper to make it wider at the top.

Then I pinched the edges to make it flatter on the sides.

I’ll write more about the cloth mache of the tongue and mouth next time. But I wanted you to see the finished tongue before then. So here is Smaug again, from the front. Check out the tongue.
By the way, thank you all so much for the nice remarks and comments about my dragonfly project. Even though it doesn’t help me to like it any more, I really do appreciate the support. You are the best! And thank you for your patience.
Until next time…Make Art!

He looks amazing! 😀
Thanks Marika!
This is out of the world amazing… excellent job done i must say! 😊
Dan, I think as artists we sometimes find ourselves working on a piece that is just not working for us . Well ,shit just happens sometimes So don’t be so hard on yourself, your work is wonderful !!! Even the dragonfly 🙂 On to the next challenge !!!
Thanks Eileen. I feel better after the bug. This is not unusual. We all go through it. And I’m definitely on to other things!
You can make this.l am Chinesestudent.Can you take wthis me.
I do not understand. Sorry.
I am a Chinese students’ English is not very good. So you may not understand what I said just now. I want to ask is you. will you make the arts and crafts? If you konw you can teach me? I want to make a gift to girlfriend.
I am a Chinese students’.English is not good.I want to ypu can teach me,how to make this arts and crafts.I want to send my girl friend.
Holle!
I asked the question,you can see?
I am sorry, but I do not have the time to give individual lessons. You can find the information you need on my blog and videos and website.
Where l can find you videos.
They are on Youtube. My channel is called Gourmet Paper Mache.
Thank you.I like you arts and crafts.I wish you to better and better.
Sorry I cannot help more. If you have questions while working on your project I can try to answer them. Good luck
What can I take libetry to ask, what notionality are you.
I live in the US
I am a Chinese student.I really like your crafts.
Hello!What is the name of the book that where I can buy.
The books I have for sale are on my website, https://gourmetpapermache.com/about-my-books/
I’m glad to know you had something going besides the blanket-blank dragonfly at the same time. Smaug is wonderful! Thank you for tips re differences between using white glue and flour/water. You did a lovely job on his tongue, and he looks like he’ll turn his head and blast ya any second!
Hi Dan ,this piece is amazing !!!! Thanks for the hint about glue vs flour .
As for the dragonfly … I think as artists we occasionally find ourselves working on a piece that just does not work for us . Well ,shit just happens sometimes . So don’t be so hard on yourself, your work is wonderful !!! Even the dragonfly 🙂 On to the next challenge !!!
I just love your work and Smaug is astounding! You are simply the best Dragon maker around, if you did the entire body you’d scare the living daylights out of your cats. Or not. They seem to understand you!
I’ve a quandary, how would you suggest mending a ripped dragon? I was commissioned for a mini dragon to sit atop a staff, (a few years ago) the owner recently brought it to me for a mend-job; apparently dropped it a few too many times and there are some rip/cracks. I was thinking of joint compound, maybe macheing over that? Or I could just go with the plaster cloth; and then attempting to match paint on a pallet. Tricky because I blended and layered paint, and didn’t exactly write down what I was using because it was a one of a kind. Mostly I’m worried about the cracks and filling or mending them well.
Any suggestions? I haven’t branched into cloth mache yet but I’ve been following your work for a long time. I love all the folds and details you get with the cloth.
I would use the cloth to mend a wing. You don’t have to drape the entire wing again. Just enough, front and back to fix the rip. Can’t help you with the paint. You might have to repaint the wings. Good luck!
You should have warned us with a Smaug Alert!
Dan, you keep getting better and better!
A great job Dan. Would love to have a go at a project using your technique. Look forward to your next posts.
Wow! WOW!!! You are one amazing artist. While I love your work, I love how you share your thoughts and process even more. I look forward to your posts.
Fantabulous! The tongue is great. Yes, it’s true, every time, your work is more amazing.
The texture in the neck and jaw are extraordinary!
Great job!
Lori
My heart always skips a beat when I see a new email from you!! Lovelovelove Smaug! Can’t wait to see the video!
Your work is so beautiful! I always look forward to seeing your next work of art.
Woooow, amazing Dan. I love what you have done with the horns. Really really cool!! And the color scheme is simply stunning!!
I really like the wings and body of your dragonfly.. He was a little to evil for me. I sold a dragon mask at Renaissance faire last fall. I have a new woodland dragon. I like Smaug a whole lot. Very nice. He looks wonderful.
Thanks Claudia. Nice to hear you are selling things.
WOW THAT is a classic. This is what you’re talent is meant for….Dragons! But I love all your other pieces of art my friend. You’re fantastic.
Pingback: This Papier Mâché Smaug Would Bring a Tear to Tolkien's Eye
I really appreciate you sharing my art on your site. Thank you!
Dan thank you for sharing and perpetuating inspiration. Sigh…always so in awe of your creations. Love,light, and energy Dear Artist.
That’s a very nice sentiment. Thank you Leslie!
WOW….Your work never ceases to amaze me!!!!
Wonderful piece as always and looking forward to the next. You are such an exceptional artist that keeps us fans waiting for more!
Wow….you never cease to amaze me! Your work keeps us fans wanting more of your exceptional pieces that you make. So glad you share all the steps with us and your videos are great. Thanks!
You are very welcome. I appreciate the comment. Knowing people want to watch keeps me doing the sharing.
Thank you for sharing. Your work is beautiful. I love it
Thank you Erella!
It’s incredible! I wish I could learn to like this! Tell
me, where is better to start in this craft? I will try
in their free time.
It’s incredible! I wish I could learn to like this! Tell
me, where is better to start in this craft? I will try
in their free time.
From Russia with love)
Thanks Edgar. You just make something. That’s how you start. It doesn’t have to be very elaborate. And mine aren’t the only techniques. There are many different ways to do paper mache. You can find them all on the web.
The project and the video are both incredible, I think that you really captured the “essence” of Smaug very well. I was wondering though, why is it that you cloth mached the mouth after you attached the jaws? I’m loving the art, keep up the great work!
Hey Grumpmeister. Glad you like this. I’m happy to get something I liked after that bug. I put cloth around the teeth before I assembled the jaws. But I wanted to have the inside of the mouth and throat look more real because they were so open. So I needed to assemble first to do that cloth work. Thanks as always!
That is simply fantastic! Such talent! Such perfection!
Wouldn’t it be great to have one of those on the front of a bicycle? But it would probably cause a lot of accidents……
Sue
Thanks Sue. Yes, that would cause a lot of accidents.
Pingback: This Paper Mâché Smaug Puts Your Crappy Balloon Project To Shame | Geek Casual
Very flattered. thank you for sharing!
Amazing work. I love the natural look of the sheets with white glue.
FYI, cured white glue (PVA) can be heated and bent like plastic. I don’t know if heat would mess up your other parts but the brittle nature of the white glue sheets should become workable with a heat gun or even a hair dryer.
Thanks William. And I appreciate the tips!
Wow. Just WOW! I have just spent a happy time reading & watching the process of your making of Smaug. I love the finished creature. Thank you. Wonderful creation!
Thanks Julia! I appreciate the note.
Pingback: This Papier Mâché Smaug Would Bring A Tear To Tolkien's Eye | Gizmodo Australia
Pingback: This Papier Mâché Smaug Would Bring A Tear To Tolkien’s Eye – DailyITfix.com- Get Your Geek Fix
WOW!!!! YOUR SMAUG IS GREAT.
Thank you Jeanette! Glad you like it.
Hi, Dan!
Congratulations on Smaug! I like lots of things about him, but especially that you hand-painted the eyes. They’re gorgeous.
Sometime would you show us in detail how you secure the tongue to the back of the mouth/jaw assembly so that it stays in one position? When I made Jean-Claude, that was the hardest part. His tongue wouldn’t stay put. (And because it was my first try, and I used air-curing clay (bad move), the teeth are quite fragile, so they kept breaking when the tongue hit them.) Maybe he was trying to lick his lips in anticipation of biting me… but I don’t really think that was it.
Thank you Elizabeth. I don’t do the same thing each time I add a tongue. It depends upon the tongue. Most of the time I attach it to the back of the jaws when I add the cloth mache. So it’s part of the jaw assembly when I put the piece together. With Smaug I just wedged it in the back. The size insured that it stayed until the glue dried. It all gets covered with cloth mache which is what primarily holds it in place. Of course the wire is useful because it can be bent in a way to make it stay in the back of the jaws. Not sure if that helps. Good luck!
What color clay did you use to make the teeth? I like that combination. I use white and a little tan but mine didn’t come out as nice as yours.
Also SMAUG looks great. Thanks for the inspiration
Ray
Hey Ray. I think I used the translucent version of Premo on this piece. Good luck!
This is really excellent! I love how you’ve done the scales under his chin.
Thank you Stella! always nice to hear from you.
Pingback: The Paper Mache Smaug
Guauuuu excelente trabajo y gran habilidad como artista, Felicidades¡¡¡
Muchas gracias por la agradable comentario! Es muy apreciado.
Hi! I’ve been thinking of making a Mario statue out of paper mâché. Would you recommend taking out the inner newspaper, and using just the shell or keeping it(the newspaper) inside? Do you think it would make the statue too heavy?
Sometimes I pull the paper out, sometimes I don’t. It just depends upon how big the project is and whether or not I think it’s too heavy. I don’t know how big your project is. It certainly can’t hurt to pull out the paper. It will definitely be lighter that way. Good luck!
It’s going to be about 5 inches/12.5 cm tall and around 2-3 inches wide. With those measurements, do you think it would be a good idea to pull the paper out or not? (If you’re wondering why I called it a statue, with it being so small and all, I honestly have no idea :D. Maybe think of it as a miniature statue…?)
By the way, I love your work, it’s inspired me to start working with paper mâché!
I probably wouldn’t worry about it at that size. But you have to decide if it starts getting too heavy.
I know you probably get asked this a lot but. Where do you get the blank eyeballs at everything I have seen is already painted.
I got them at http://www.glasseyes.com
Hey Dan, I’ve been working on a bat for an upcoming event, and I was wondering how you got the brown on your bat to look the way that it does. Whenever I try mixing the yellow, blue and red, the brown always ends up much lighter in color than your bat. Any suggestions would be much appreciated! And as always, keep up the great work!
Hey Grumpmeiser. Nice to hear from you! It’s possible that mine looks darker because of the backwashing I did. Usually a darker brown has more blue in it. I don’t know how close your colors are to primary. Many times the colors you buy are actually more pastel than they look and it shows when you try to mix. That would keep the colors more muted. If you can find a Navy blue it would help with the dark color. Also, sometimes I just use some acrylic paints (from the tubes) to brighten up colors. They are usually more saturated. I don’t know if that helps. Good luck to you!
That helps a lot! Thanks for the advice, I tried it out and it made the brown before black washing darker, thank you!
Omg I so want one looks amazing
Glad you like this one! Thanks!
I want paper mache guide book i m r really big fan of urs i like ur art work n i want 2 try.
Hello Varad. I am not sure where you live. I do sell my book on my site, https://gourmetpapermache.com/about-my-books/
Good luck
hi, I need to paper mache a tennis shoe for school, but have no idea how to do this, and make it look realistic. Any running shoe will do. I can’t find any good tutorials, would you mind giving me some instructions or help? Thank you so much! You’re very talented.
Hello Rachel. Not sure what I can do to help. I would start by crumpling paper in the general shape of a shoe and paper mache over it. Then sculpt with pieces of paper and masking tape. I add a “skin” of cloth (bed sheets) dipped in white glue. That would work well in constructing a shoe. You can see examples of these techniques on my blog. You just need to apply those to your sculpture.
Good luck!
Ur are an artist!!! Just a few questions what do u use to make the teeth and how do you do it also how do u stick them on
Hello Ram. Thanks for the nice comment. I make the teeth out of Fimo or Sculpy (polymer clay). I usually hot glue them on the jaw and then wrap them with cloth dipped in white glue. Good luck!
hi dan, just reading your comments and i love the way you answer everyone its really nice, and i love your work as well, i have made your snake dragon for my daughter, your videos are really helpful, i slow them down to get a better idea of your process. cheers sharon
Thank you for the nice remarks Sharon! They are much appreciated. I am glad I was helpful with your project. Remember I do show many projects being made, step by step, on my blog under “older paper mache projects”. Take care
I am trying to find step by step instructions on how to make the great white shark…I keep watching the time lapse but would really benefit from written /photos instructions.. can anyone point me in the right direction..
love the work Dan us doing…what master of his craft….thank you
Hello Dandy. I don’t do tutorials on every project I make. But I use the same techniques on all of my projects. I always hot glue teeth onto paper mache shells for the jaws, then wrap with my “cloth mache”. If you look at the video, you can see that, in this case, I inserted a couple smaller shells with rows of teeth to get three rows of teeth. Then I wrapped them with the cloth mache. You can see me do that in any of my tutorials. I made the body the same way I make all the bodies. I crumple paper in balls, tape lots of balls together for big pieces, then later after adding the paper mache I cut a hole in them and pull out the wads of paper. I build with shells from several pieces if need be. I think the video shows that clearly. The shark is a caricature of a great white. The dimensions are not at all in scale with a real shark. I wanted to emphasize the giant mouth. So you built your body in whatever scale you think matches the jaws you make.
Remember, you can watch the video at slower speeds. Just change the viewing settings using the gear at the bottom right side of the video. Good luck!